


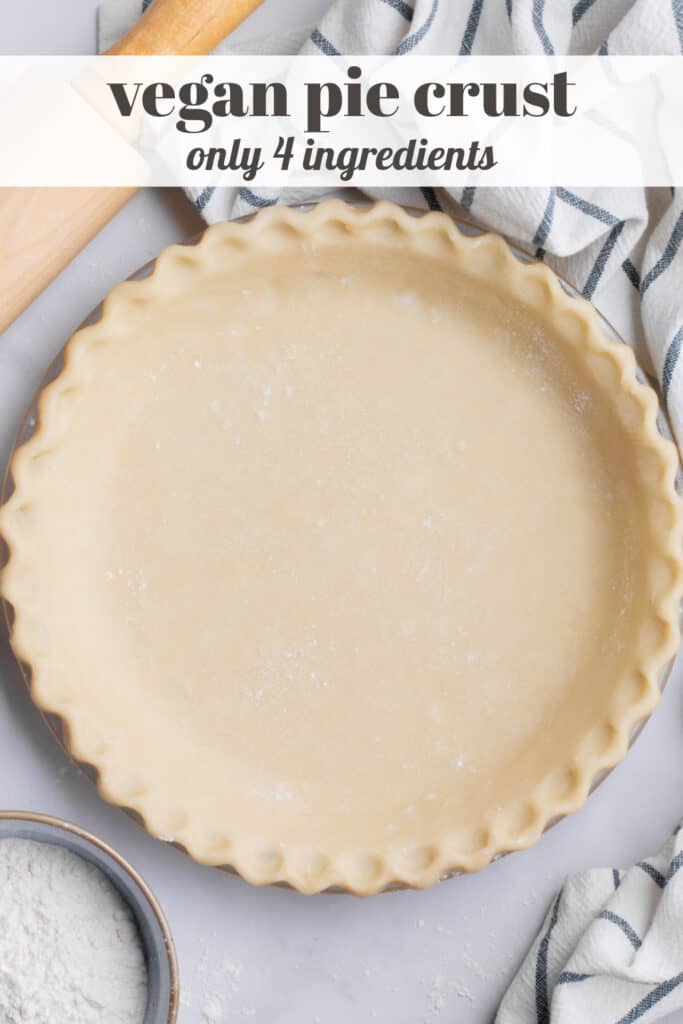
This easy vegan pie crust is delicious, tender, and perfectly flaky. It's a fool-proof recipe that can easily be prepared in 25 minutes with only 4 simple ingredients. Whether you fill your pie crust with a sweet or savory filling, it's sure to be a hit at any holiday gathering.
A delicious pie starts with a delicious crust made from scratch. I've used store-bought vegan crusts in the past, but they just aren't as good as a flaky, golden brown, homemade pie crust.
So, a few years ago I decided it was time I learned how to make a pastry with perfectly flaky layers. Since then, this has been my go-to vegan pie crust recipe for all of my holiday pies, especially this vegan pumpkin pie!
This started out as a coconut oil crust but recently I switched to using vegan butter. The flavor of the all-butter crust is always a huge hit with everyone! But if you prefer coconut oil, feel free to use it instead.
Ingredients You'll Need
These 4 common ingredients are all you need to make this vegan pie crust.
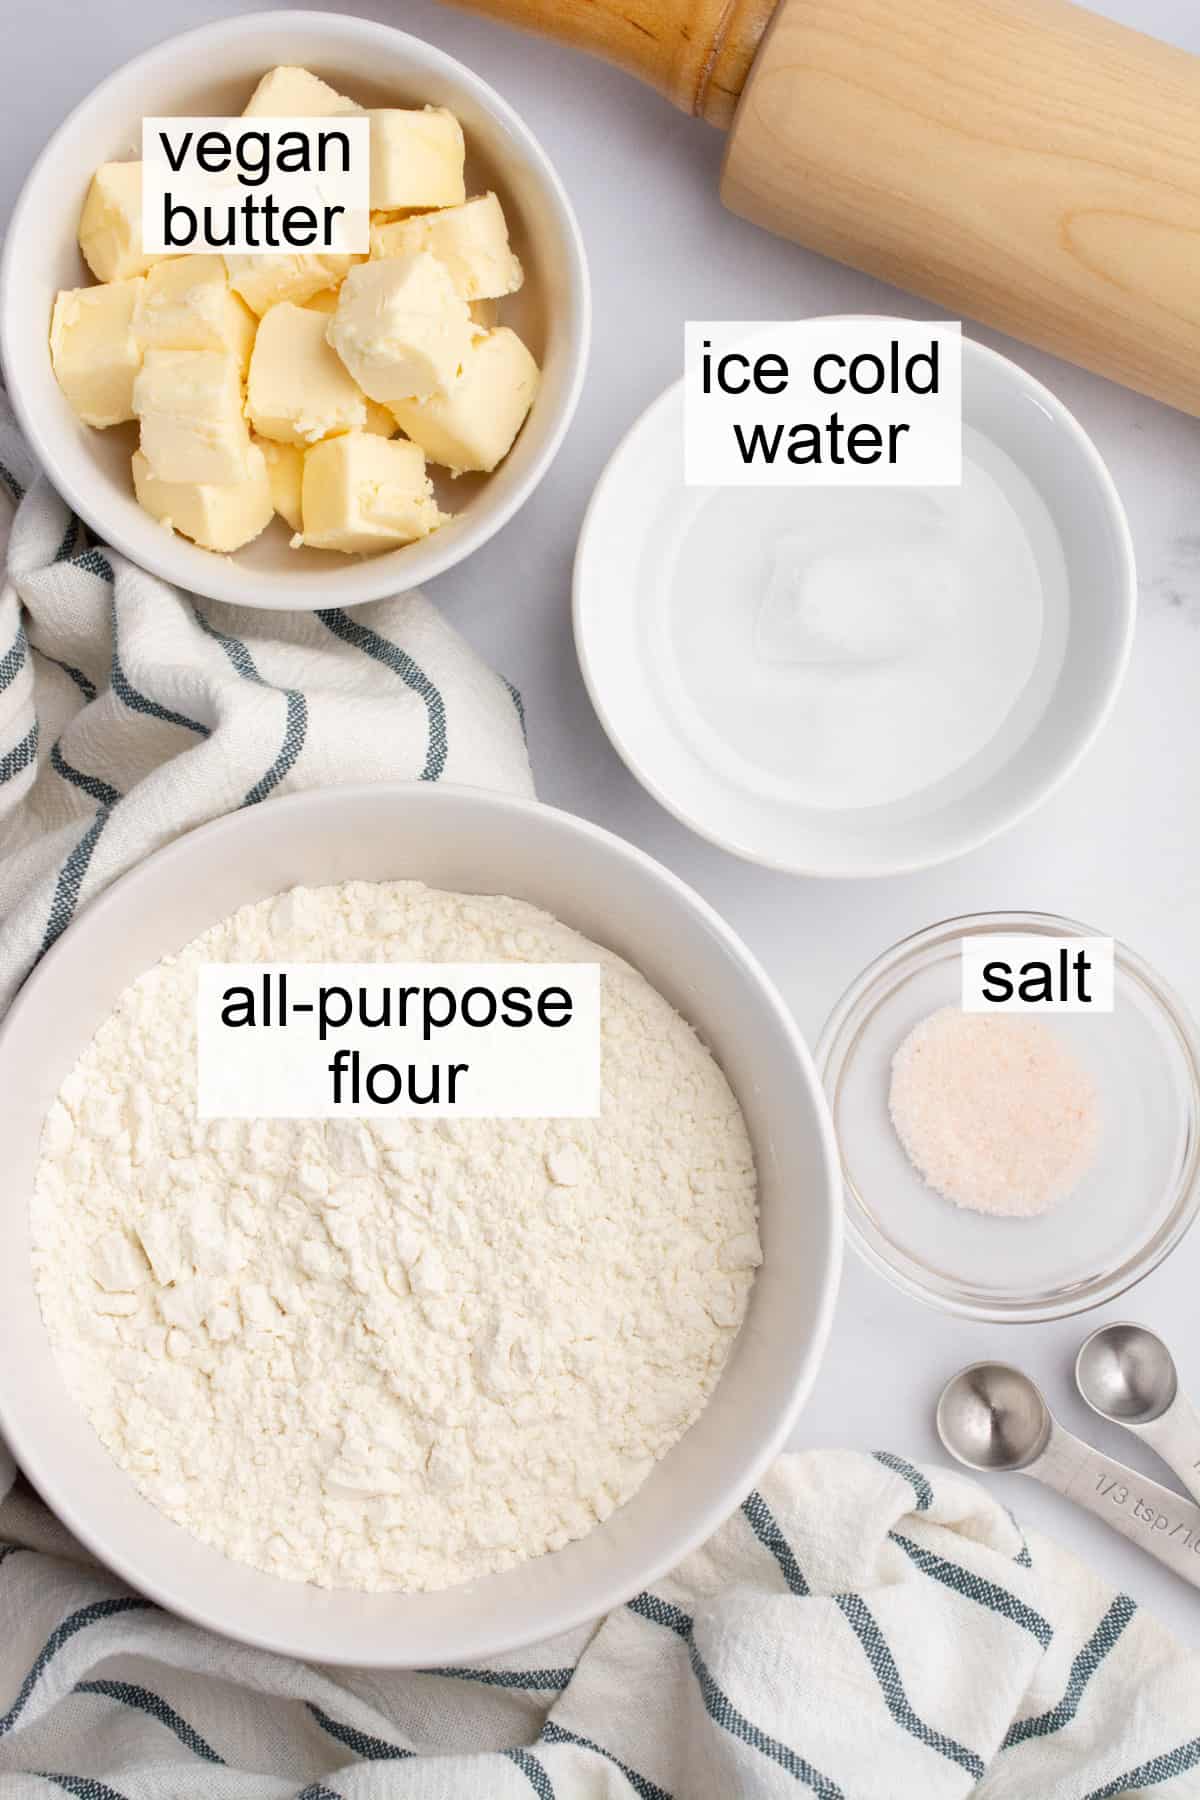
- All-purpose flour - Use any kind of all-purpose flour you have available. For a gluten-free crust, a 1 to 1 gluten-free all-purpose flour can be used.
- Vegan butter - Cold butter is the key to a flaky pie crust. Any vegan stick butter will do -Earth Balance, Miyoko, CountryCrock plant butter, or equivalent.
- Ice-cold water - To keep the butter cold, ice-cold water is used.
- Salt - Use any salt you have on hand. I used Himalayan pink salt.
- Sugar - This brings the flavors of the crust together. It is an optional ingredient, but I suggest using it, especially for sweet pies.
Instructions
In this recipe, I'll walk you through the steps of making a perfect homemade pie crust. Whether you're making the dough in a food processor or by hand, I'll show you how easy it is to bring together.
If rolling out the dough or crimping the edges keeps you from making a crust from scratch, worry no more. With my fool-proof method, you'll be making perfect vegan crusts in no time!
How to make vegan pie crust in the food processor
Learn how to easily make a flaky and tender crust in the food processor by following these steps.
If you don't have a food processor, instructions to make this pastry by hand are below.
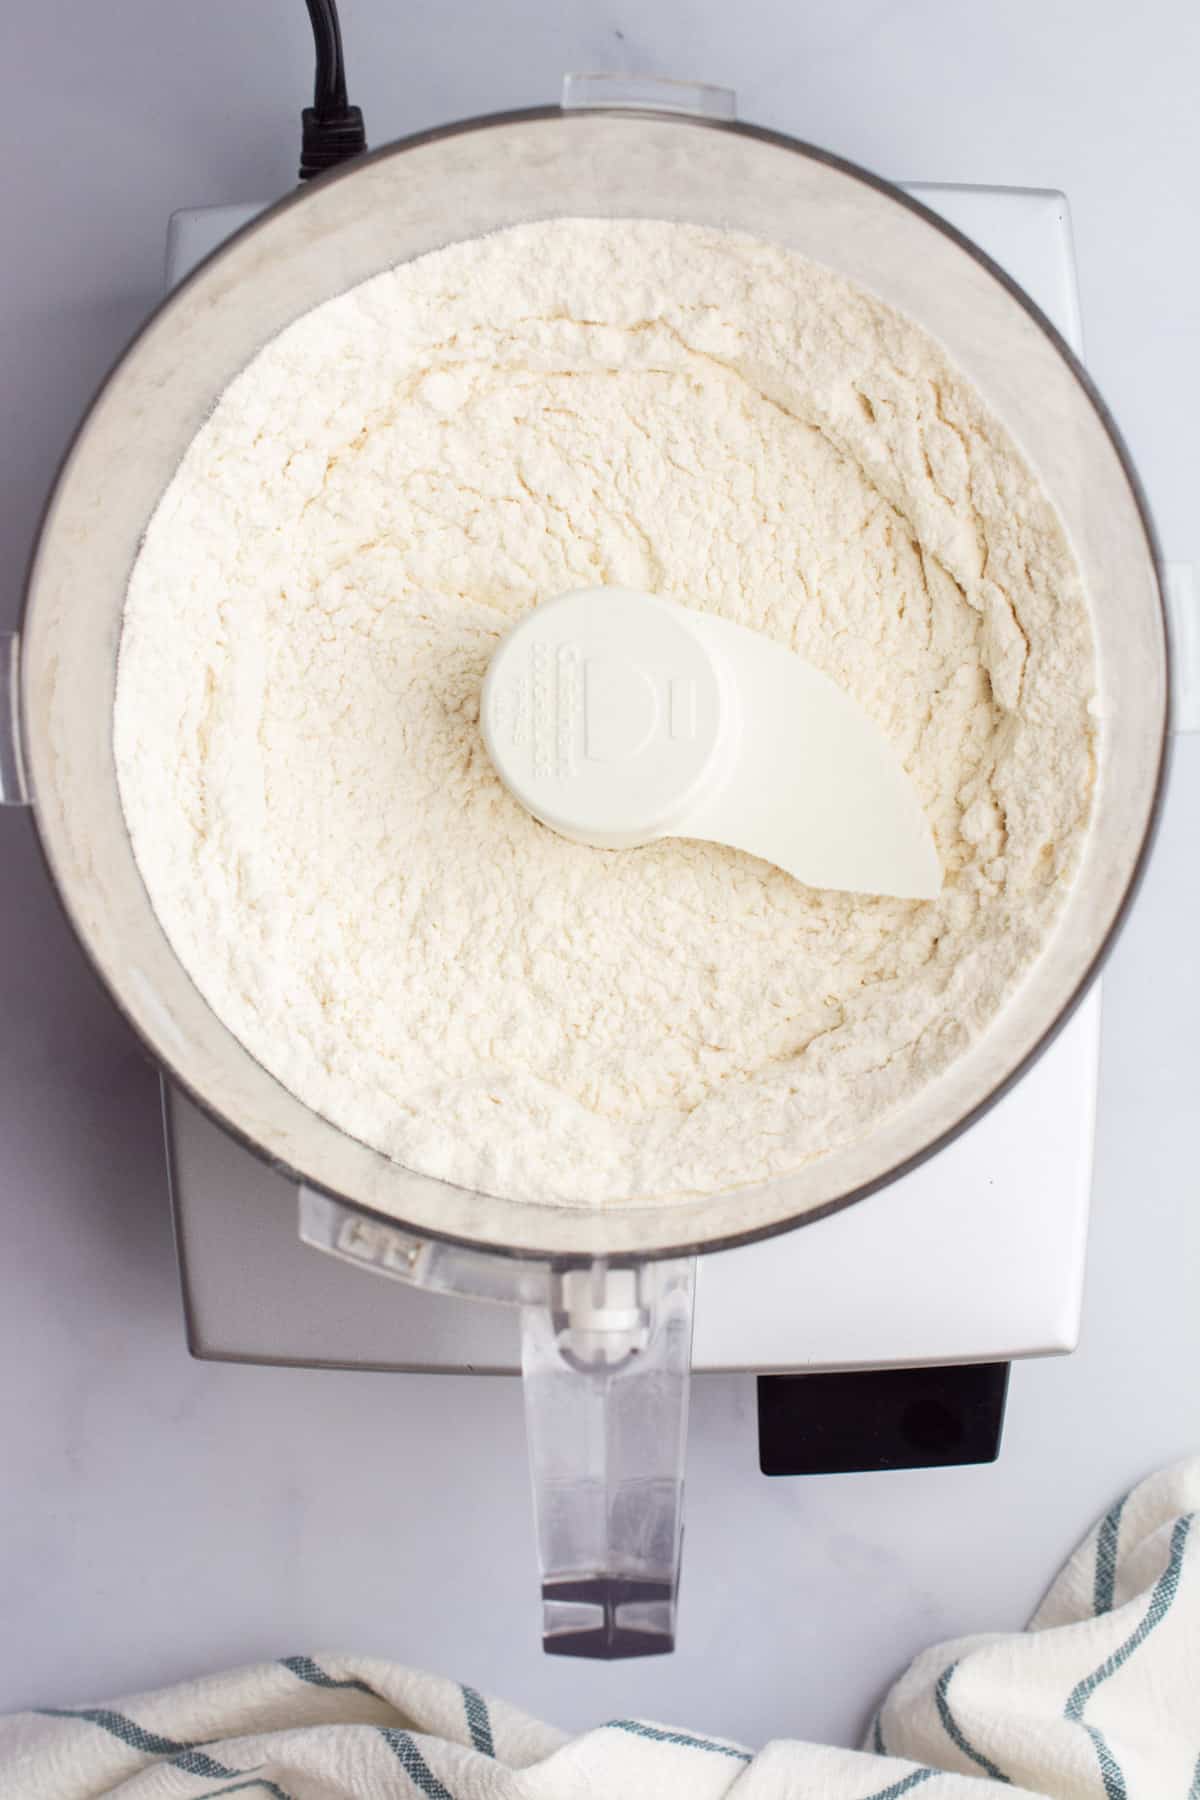
Start by adding 1 ½ cups of flour, ½ teaspoon of salt, and 1 ½ teaspoons sugar (optional), to the bowl of your food processor. Using an S-blade or dough blade, pulse a few times to combine.
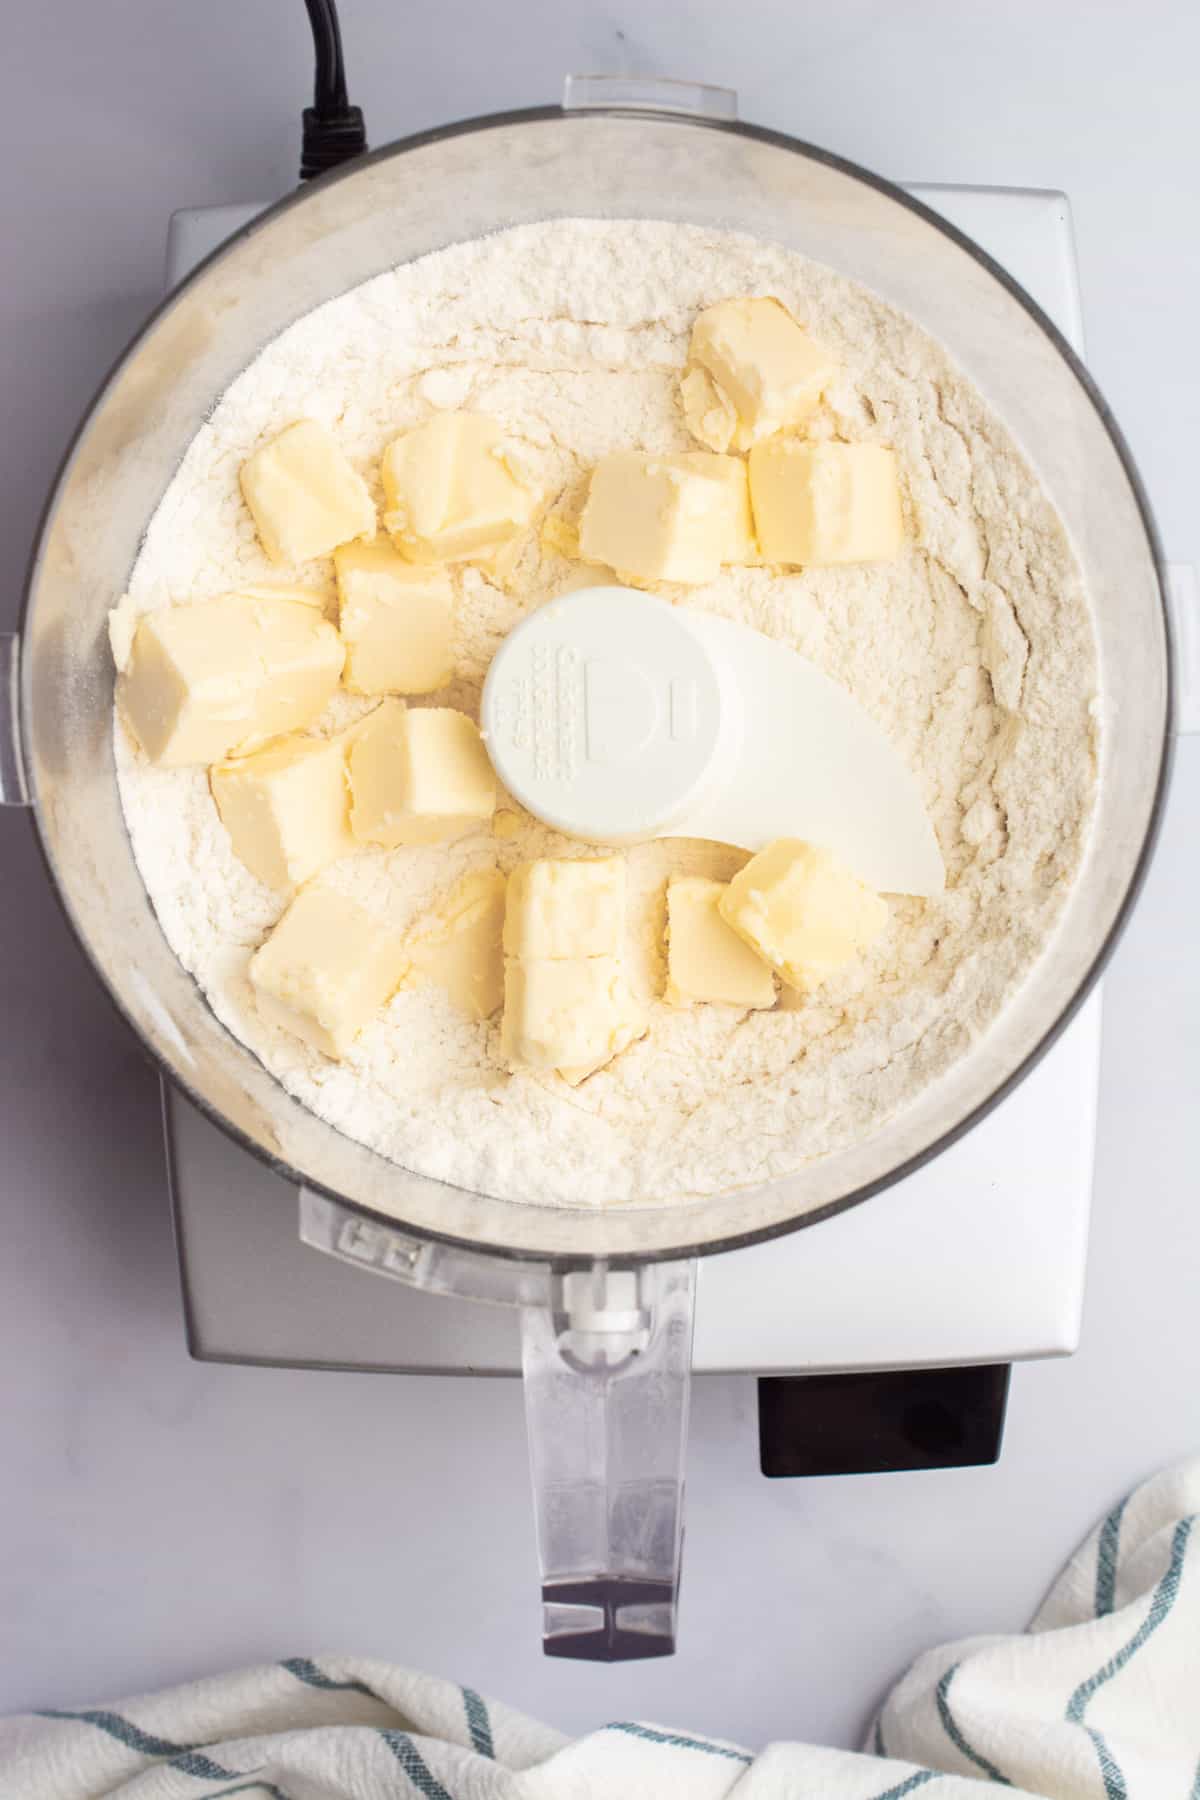
Now, scatter the ½ cup of cold butter cubes over the flour.
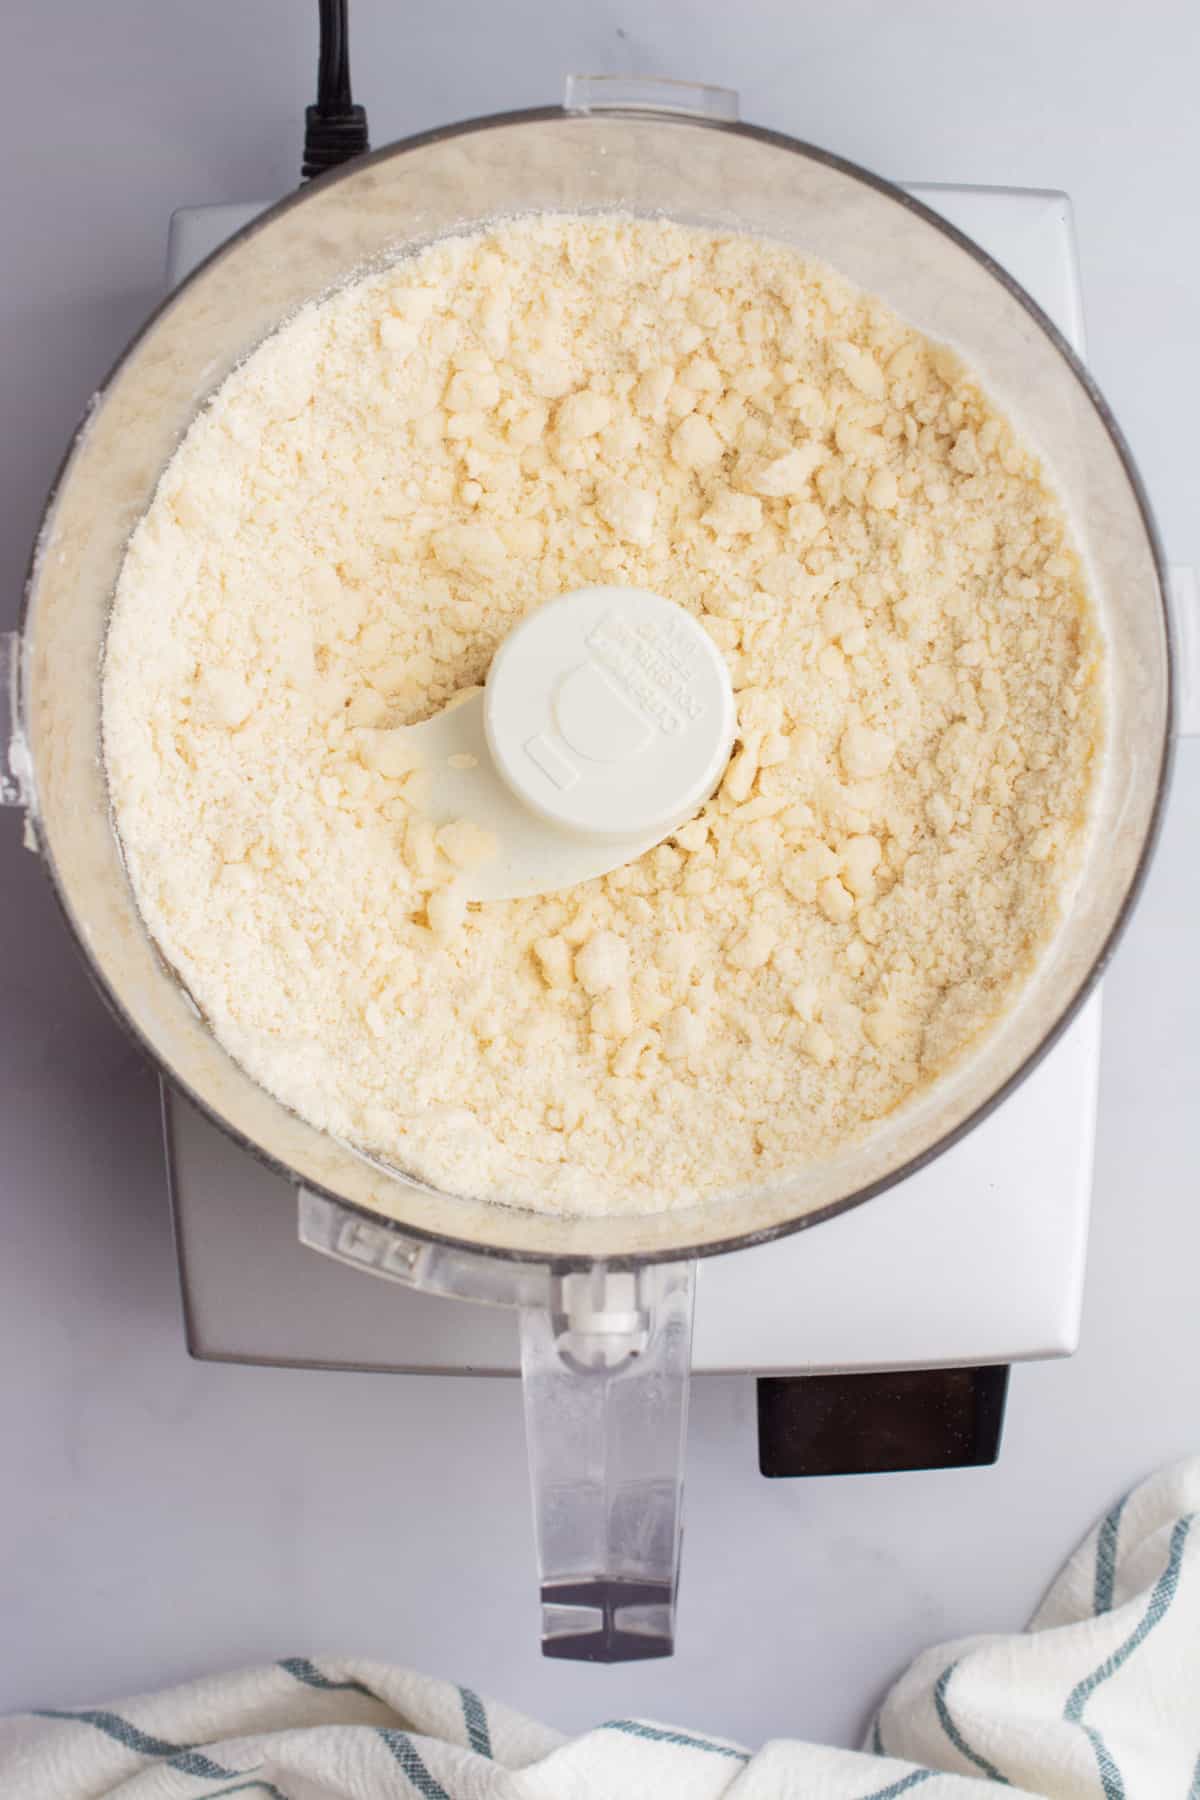
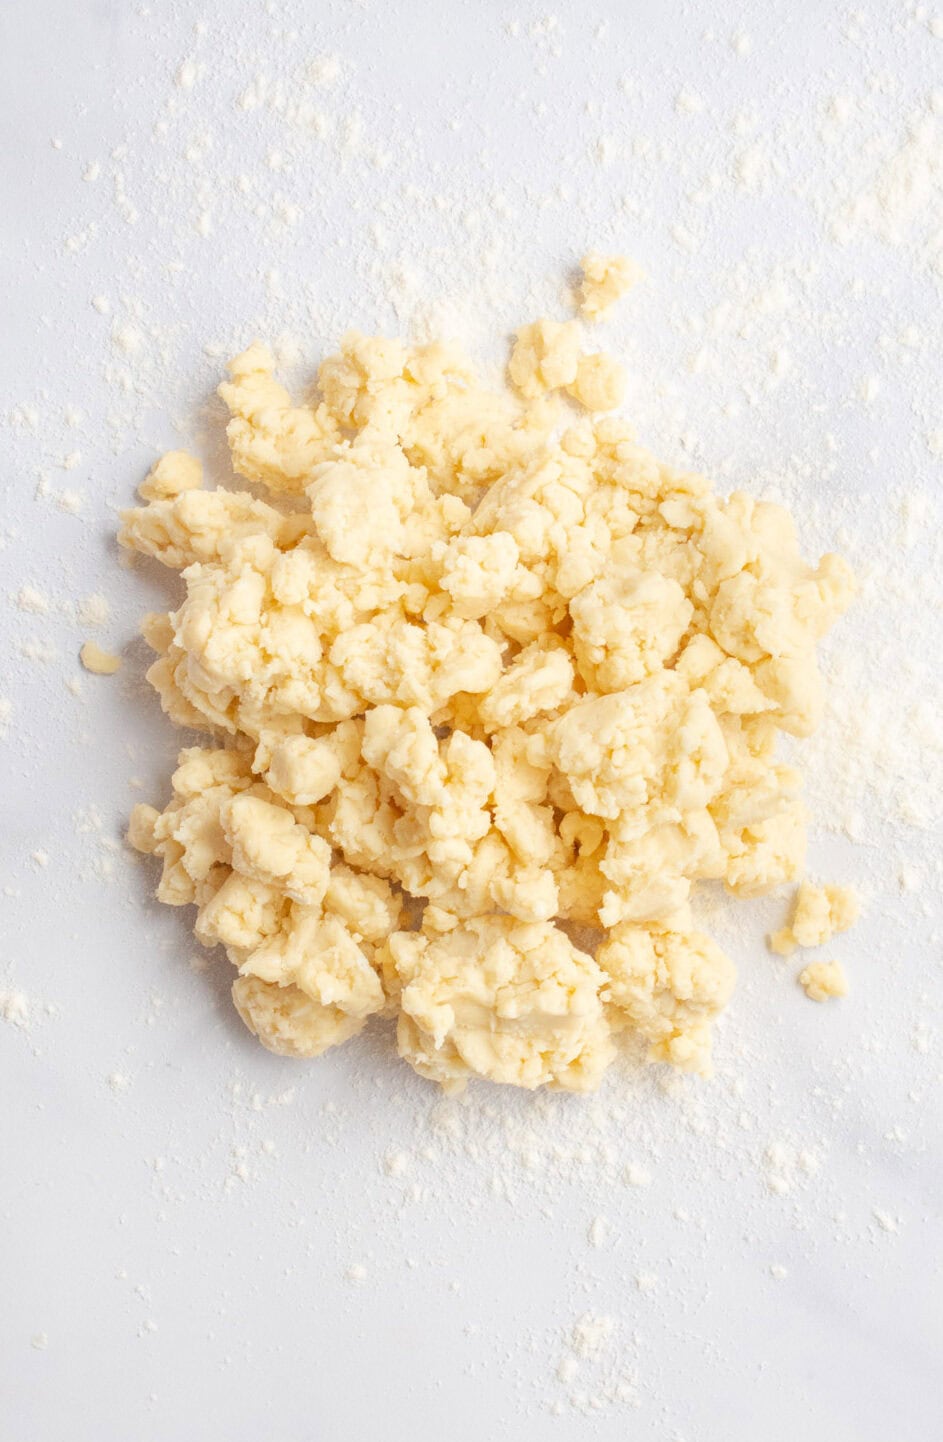
Pulse to cut the butter into the flour. The ingredients should be crumbly with small pieces of butter, as shown above.
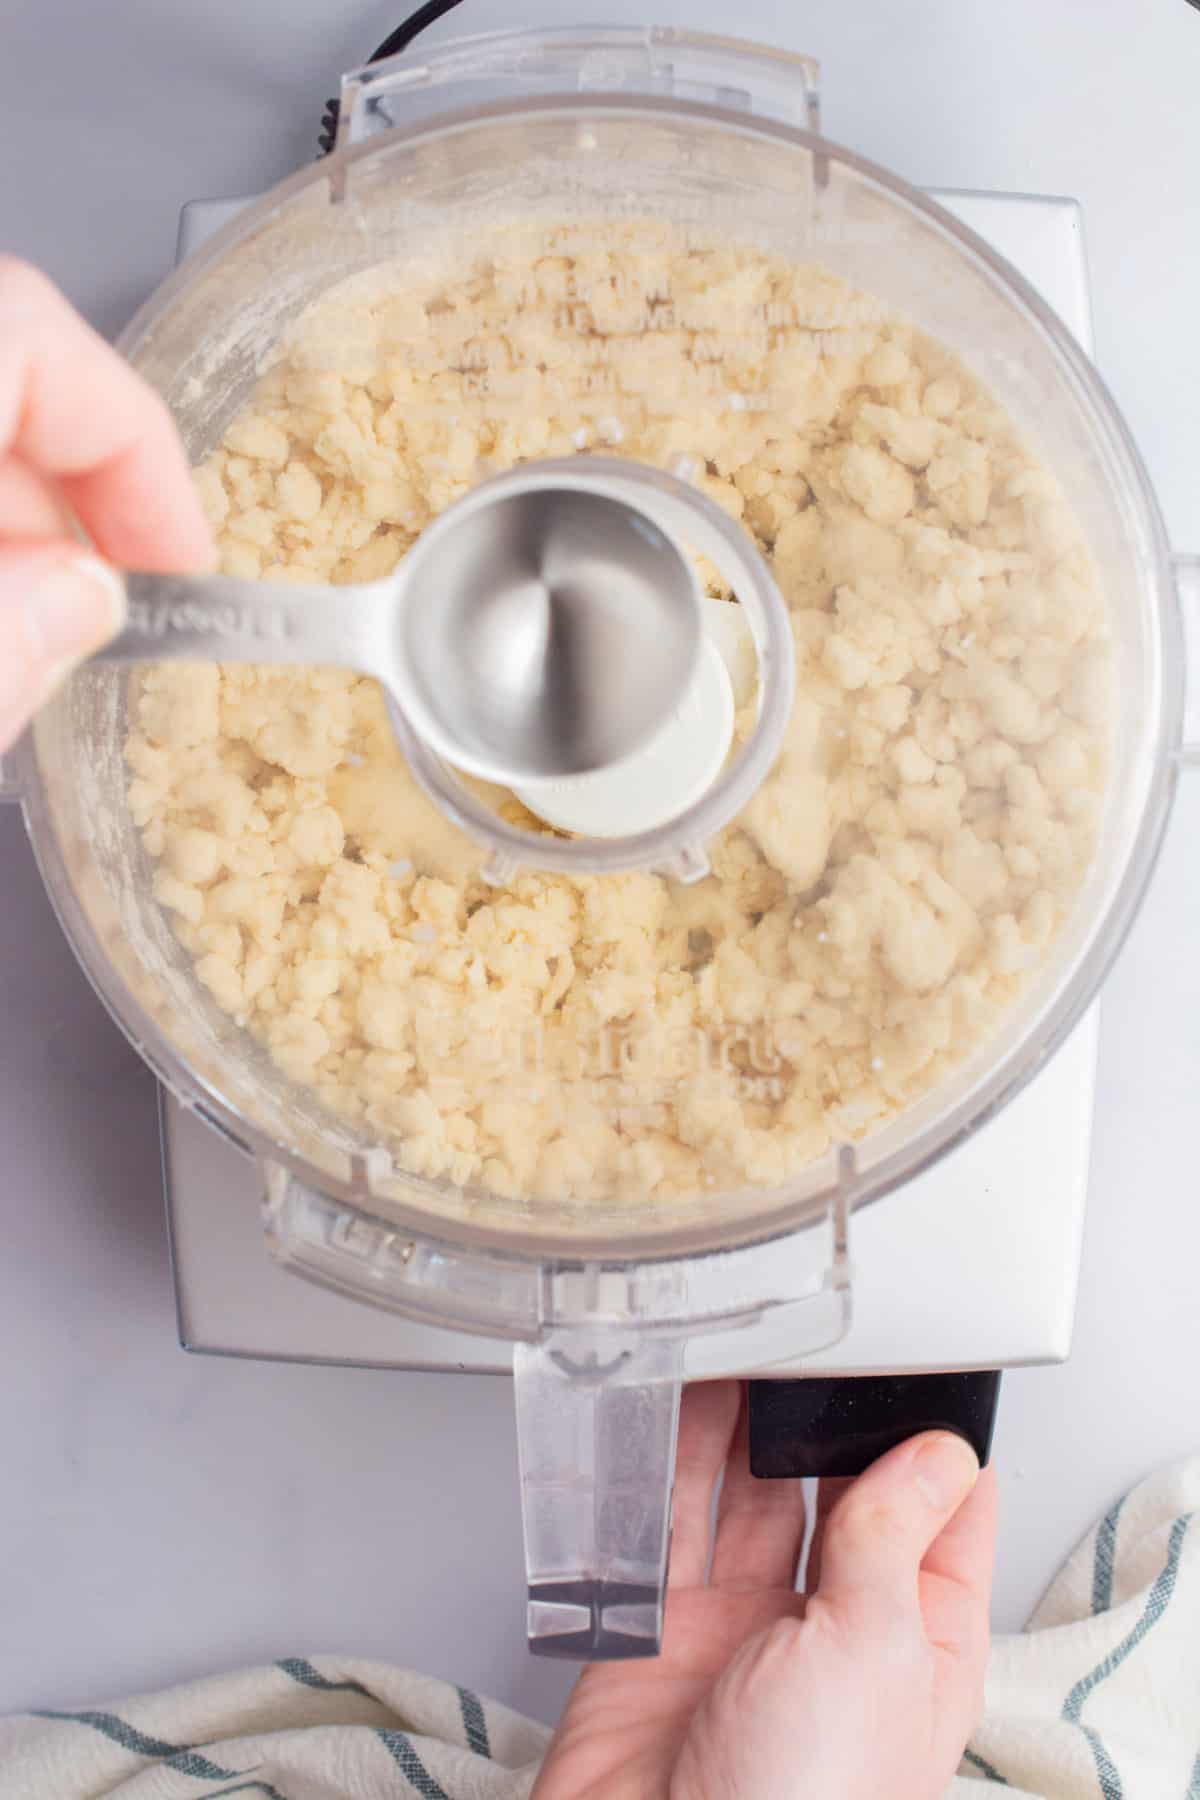
While pulsing, pour 2 tablespoons of ice water into the processor over the flour. Then, slowly add a tablespoon of water at a time while pulsing adding just enough to bring the ingredients together. Between each tablespoon stop the processor and use a spoon to bring the dry flour to the top.
(I use 3 to 4 tablespoons of water)
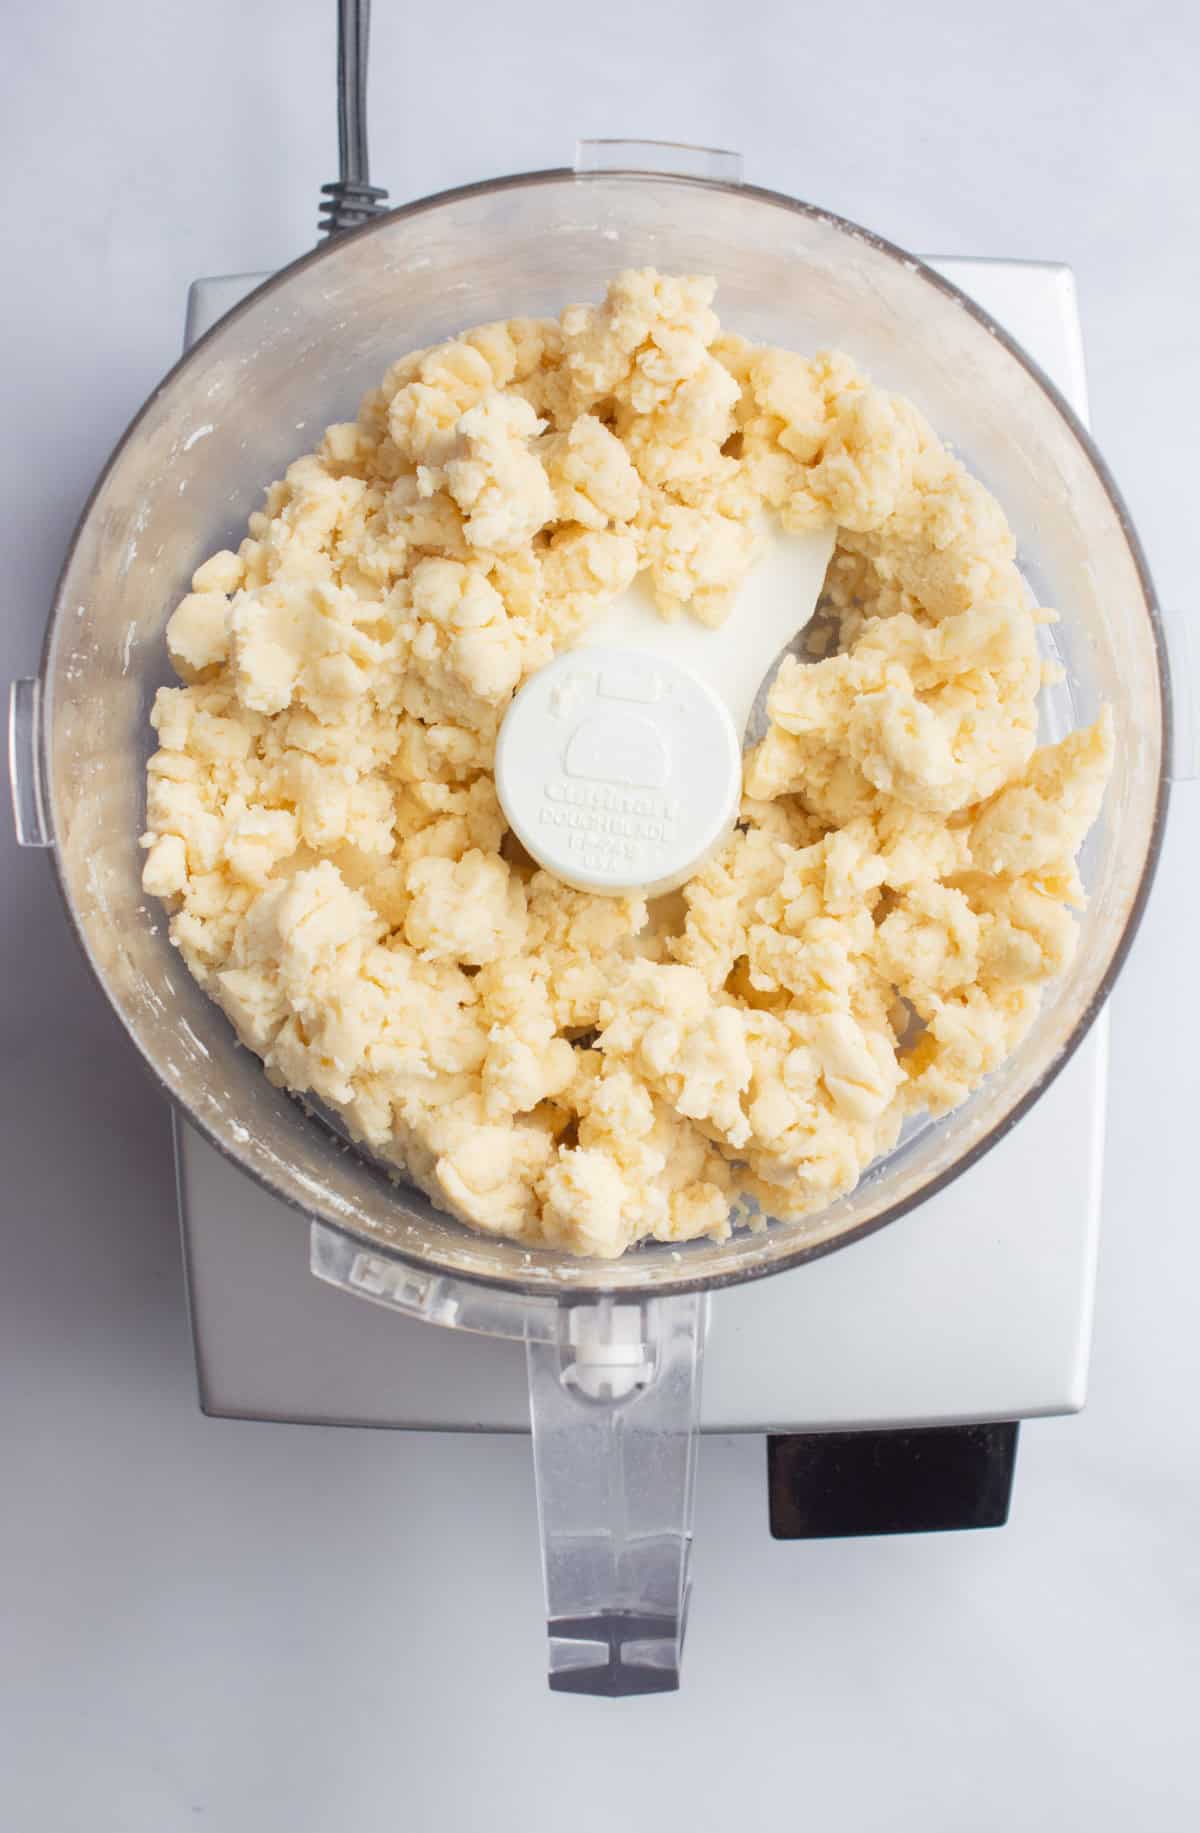
The dough should be clumpy and easily hold together when pinched. There should be none or very few dry flour crumbles in the bottom of the bowl.
Turn the dough out onto a lightly floured surface.
Working the dough
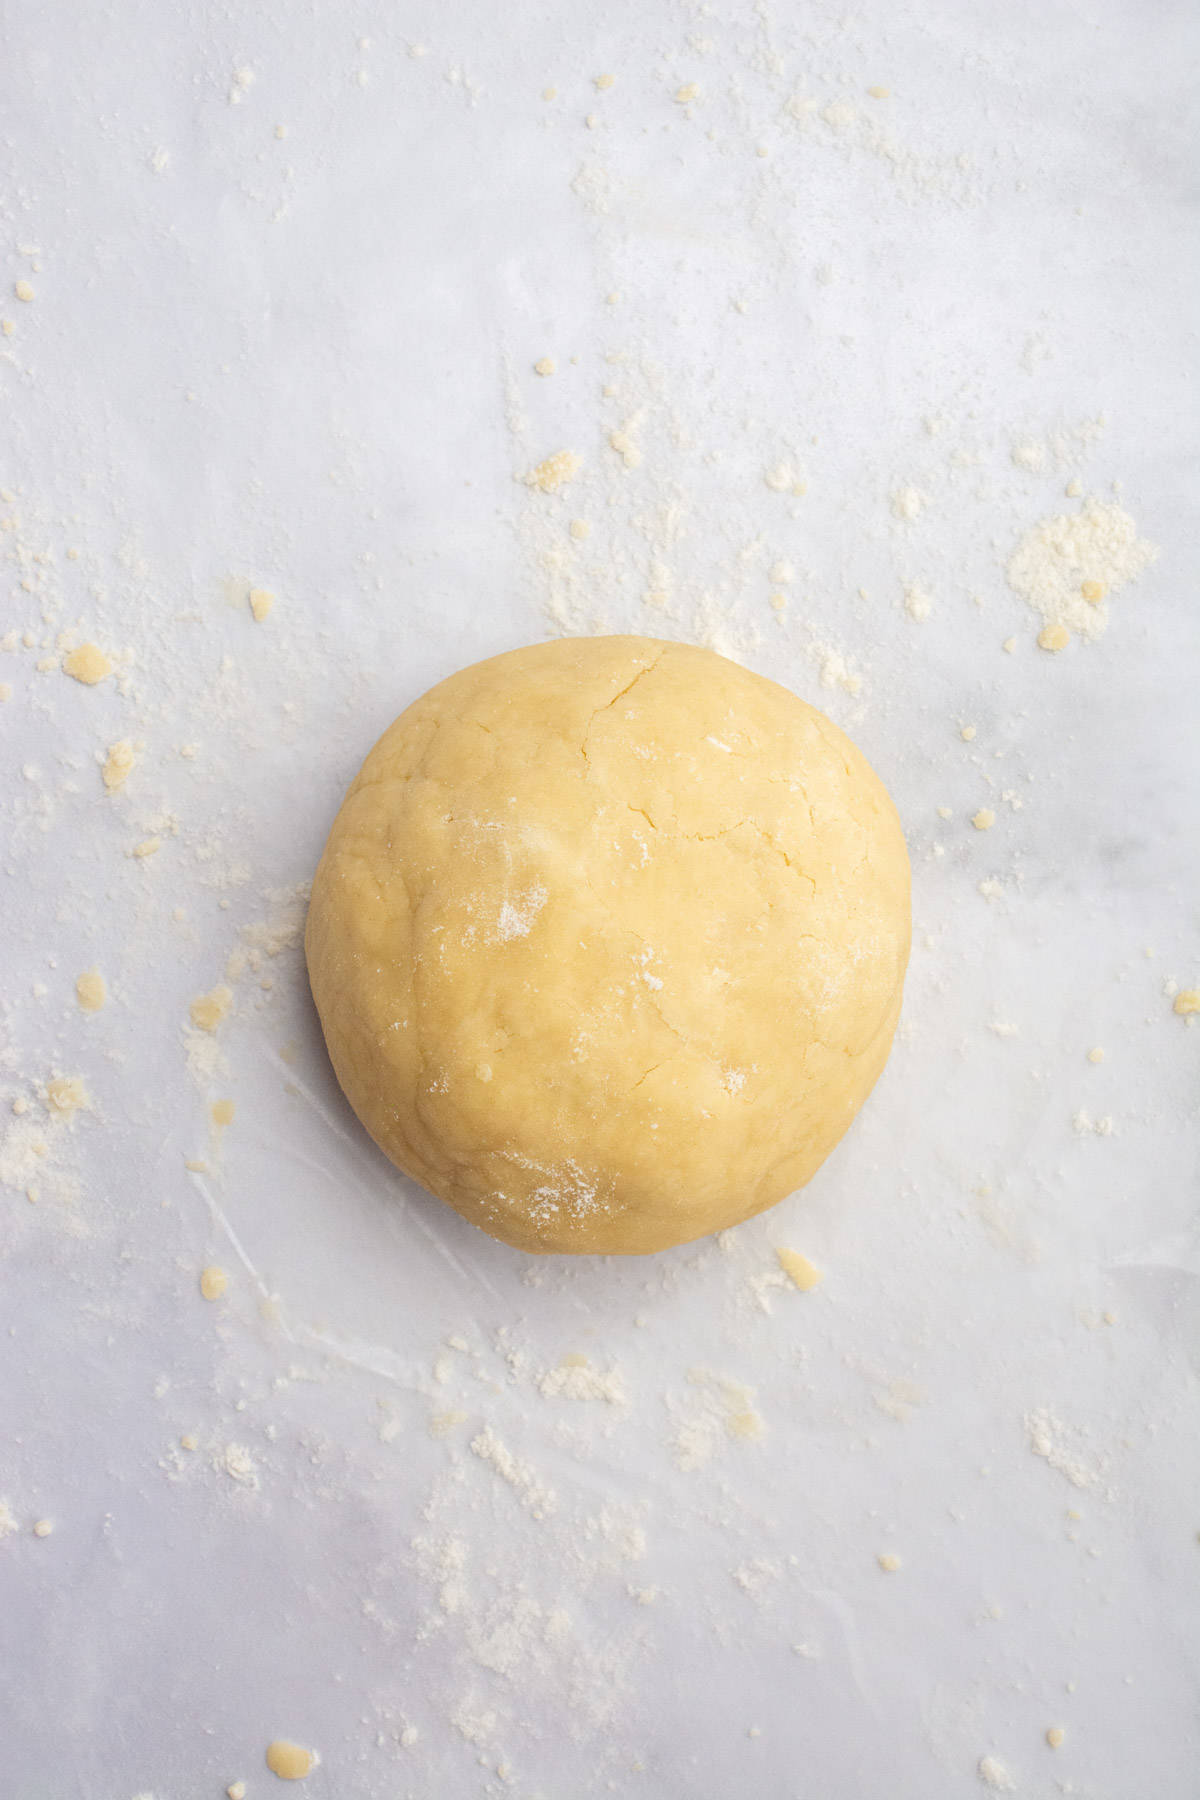
Work it with your hands to bring it together and form a dough ball.
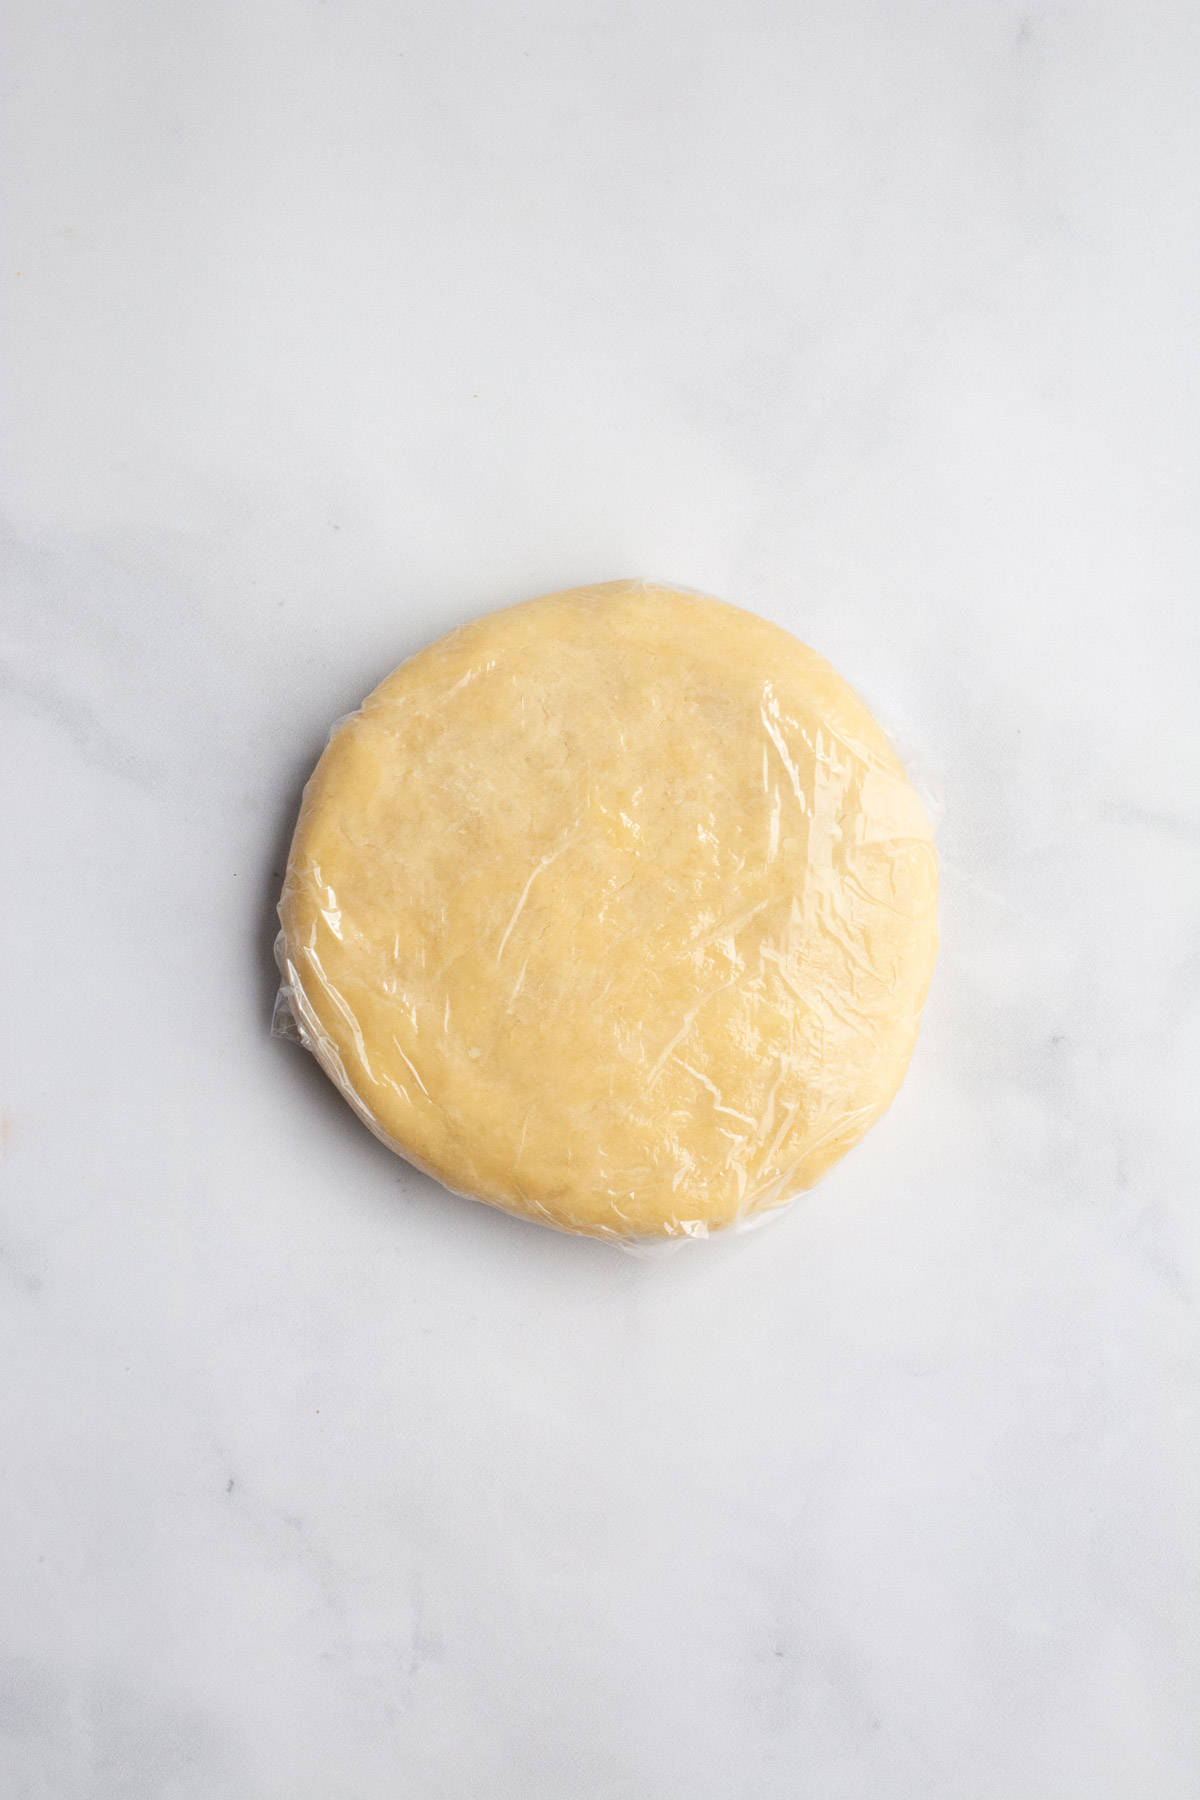
Press the ball into a flat disk and wrap it in plastic wrap. Chill in the refrigerator for at least 30 minutes to an hour (or up to 3 days).
For a quick 25-minute crust, you can skip chilling the dough. Instead, freeze the butter cubes for 15 minutes to keep them cold during mixing. Once the dough comes together, simply roll it out and form your crust.
Rolling out the dough
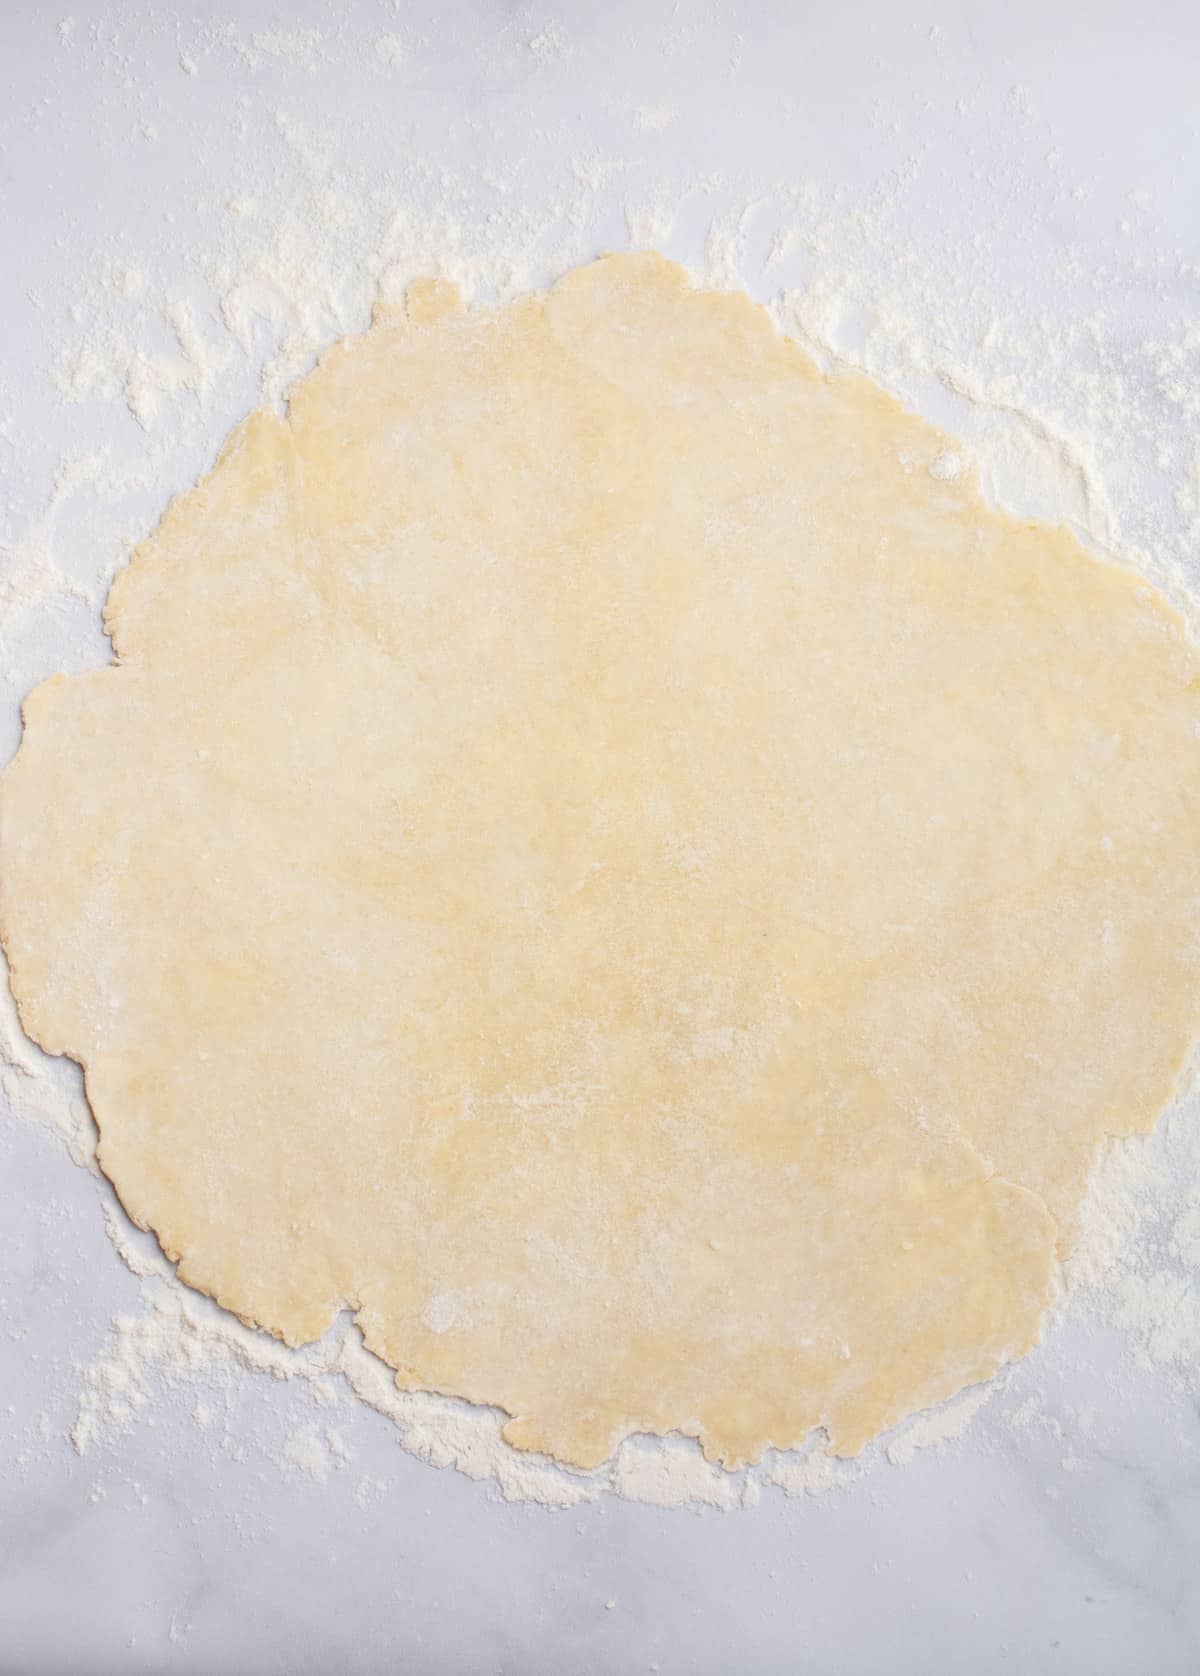
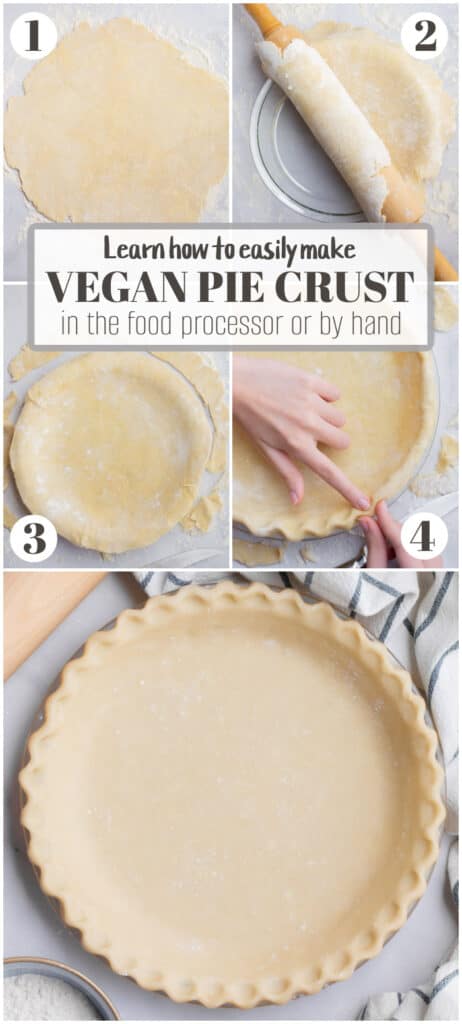
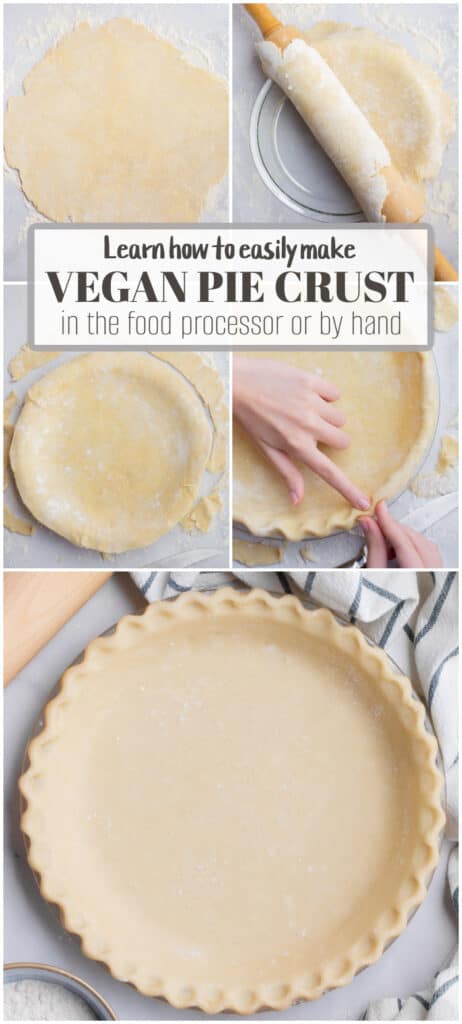
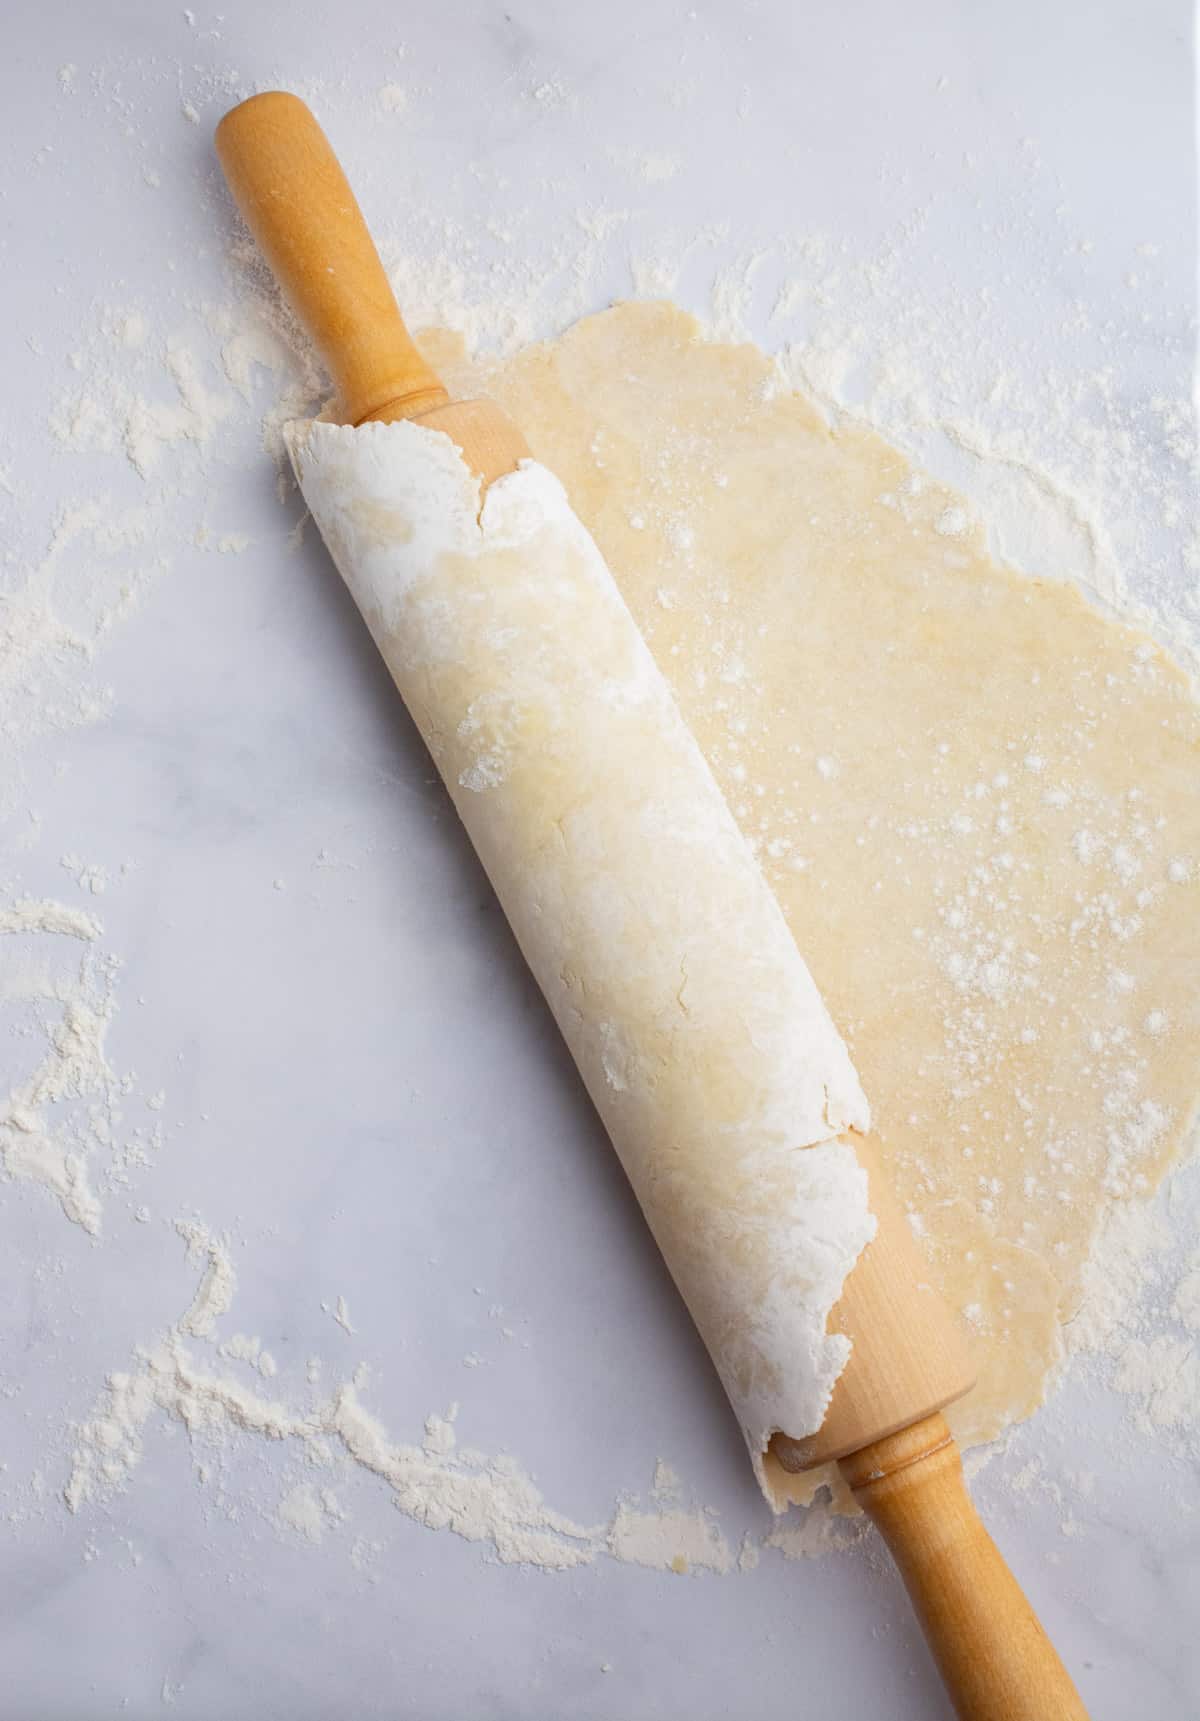
When you're ready to roll out the dough, generously flour a large work surface to keep it from sticking. Place the dough in the center of the floured surface. Use a rolling pin to roll it out to a 12-inch to 14-inch diameter.
Tip: Generously flour your work surface so the dough doesn't stick. As you roll, periodically spin the dough and add more flour as needed to keep it moving freely.
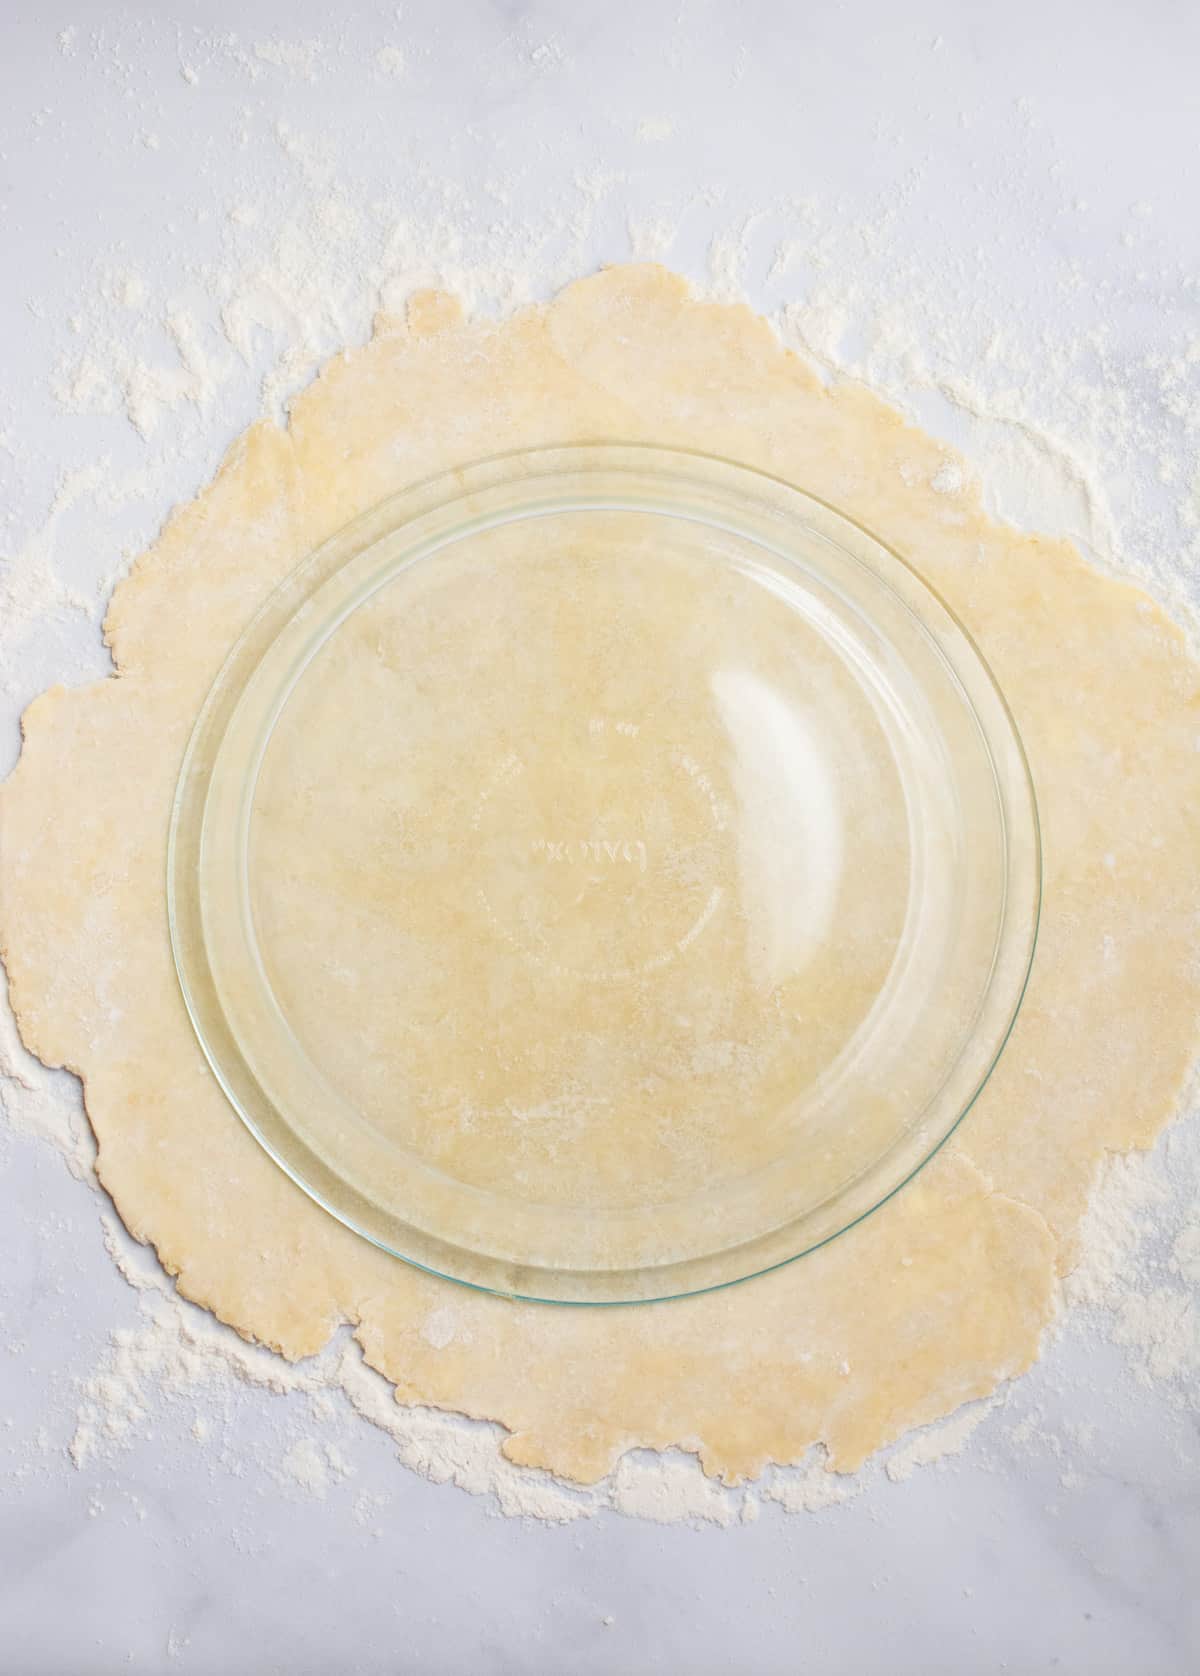
I like to hold my pie dish over the pastry dough to make sure there are about 2 inches of extra dough around. It should be large enough to overhang the pie dish once it's pressed in place.
Transfer the dough to your pie dish
Use a rolling pin to easily transfer the dough to the pie dish. Start at one end and roll the dough around the rolling pin.
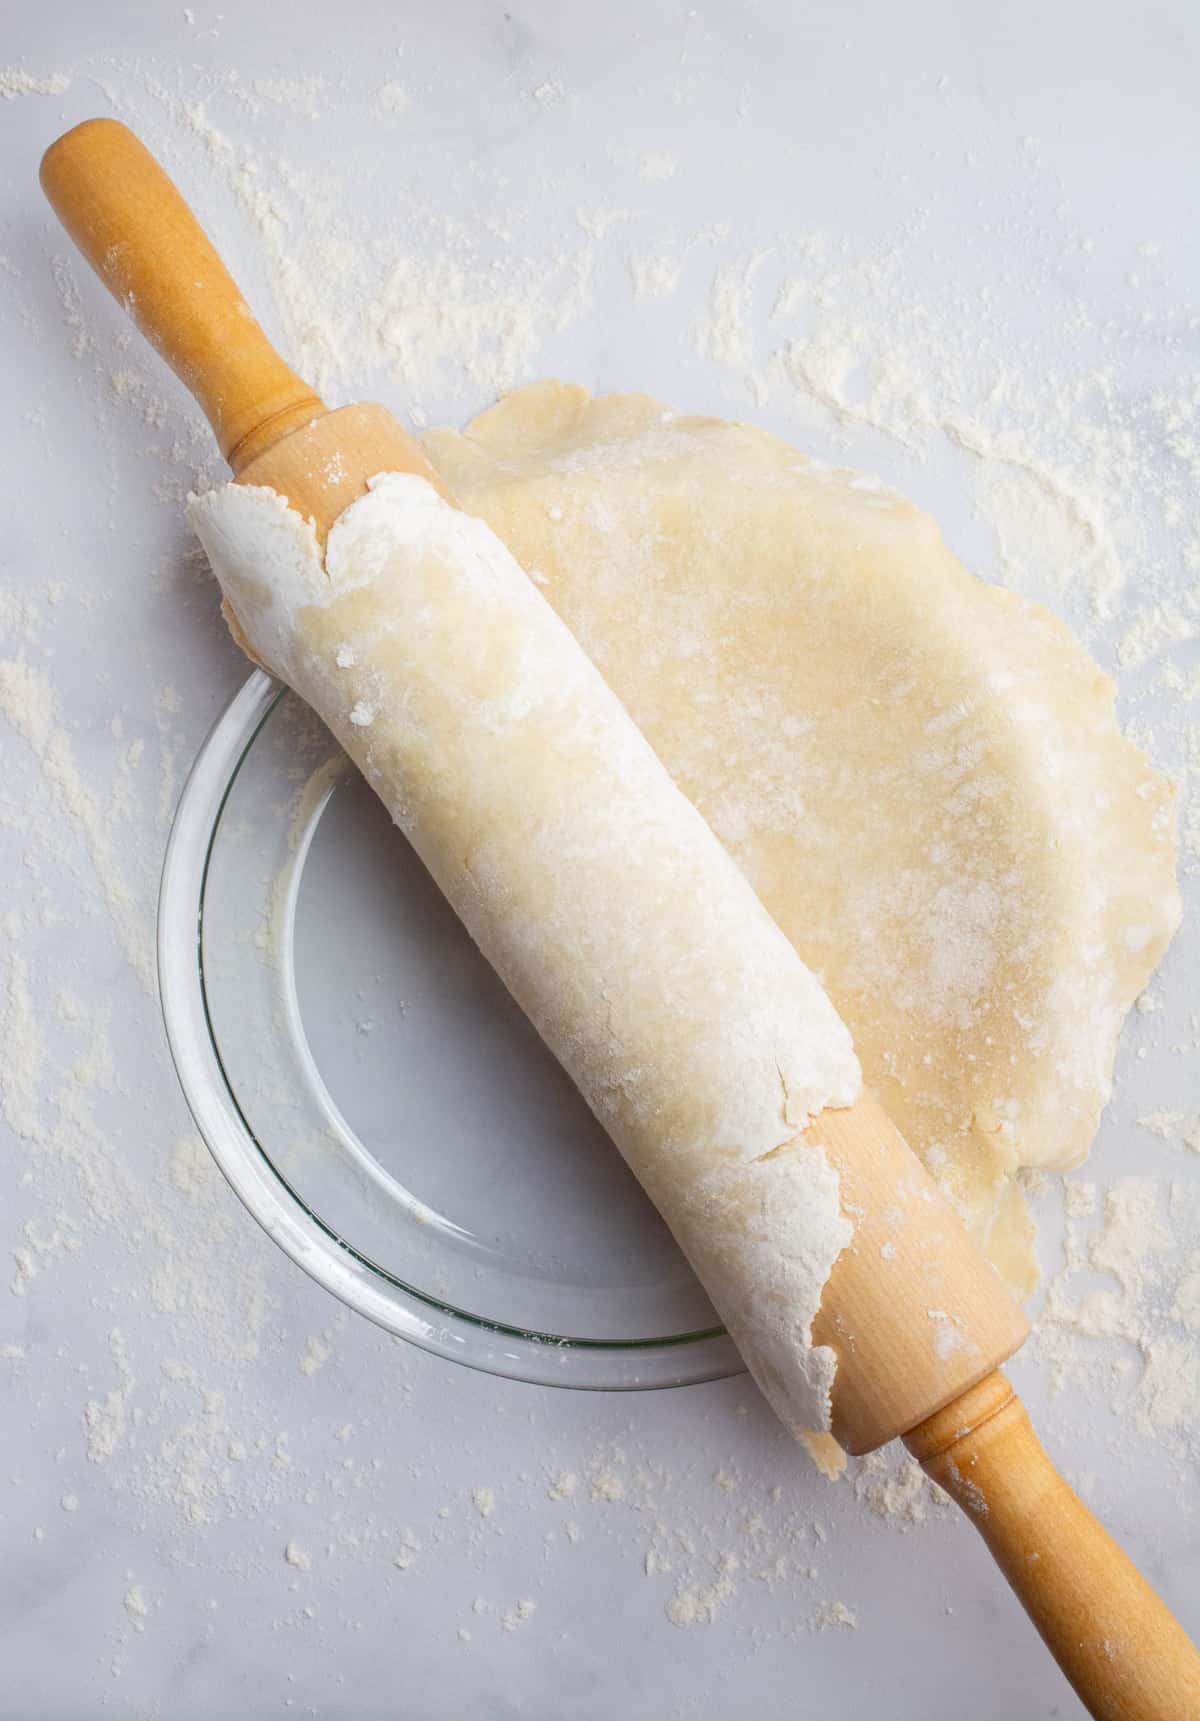
Place the rolling pin on one side of the dish and unroll the dough out across it.
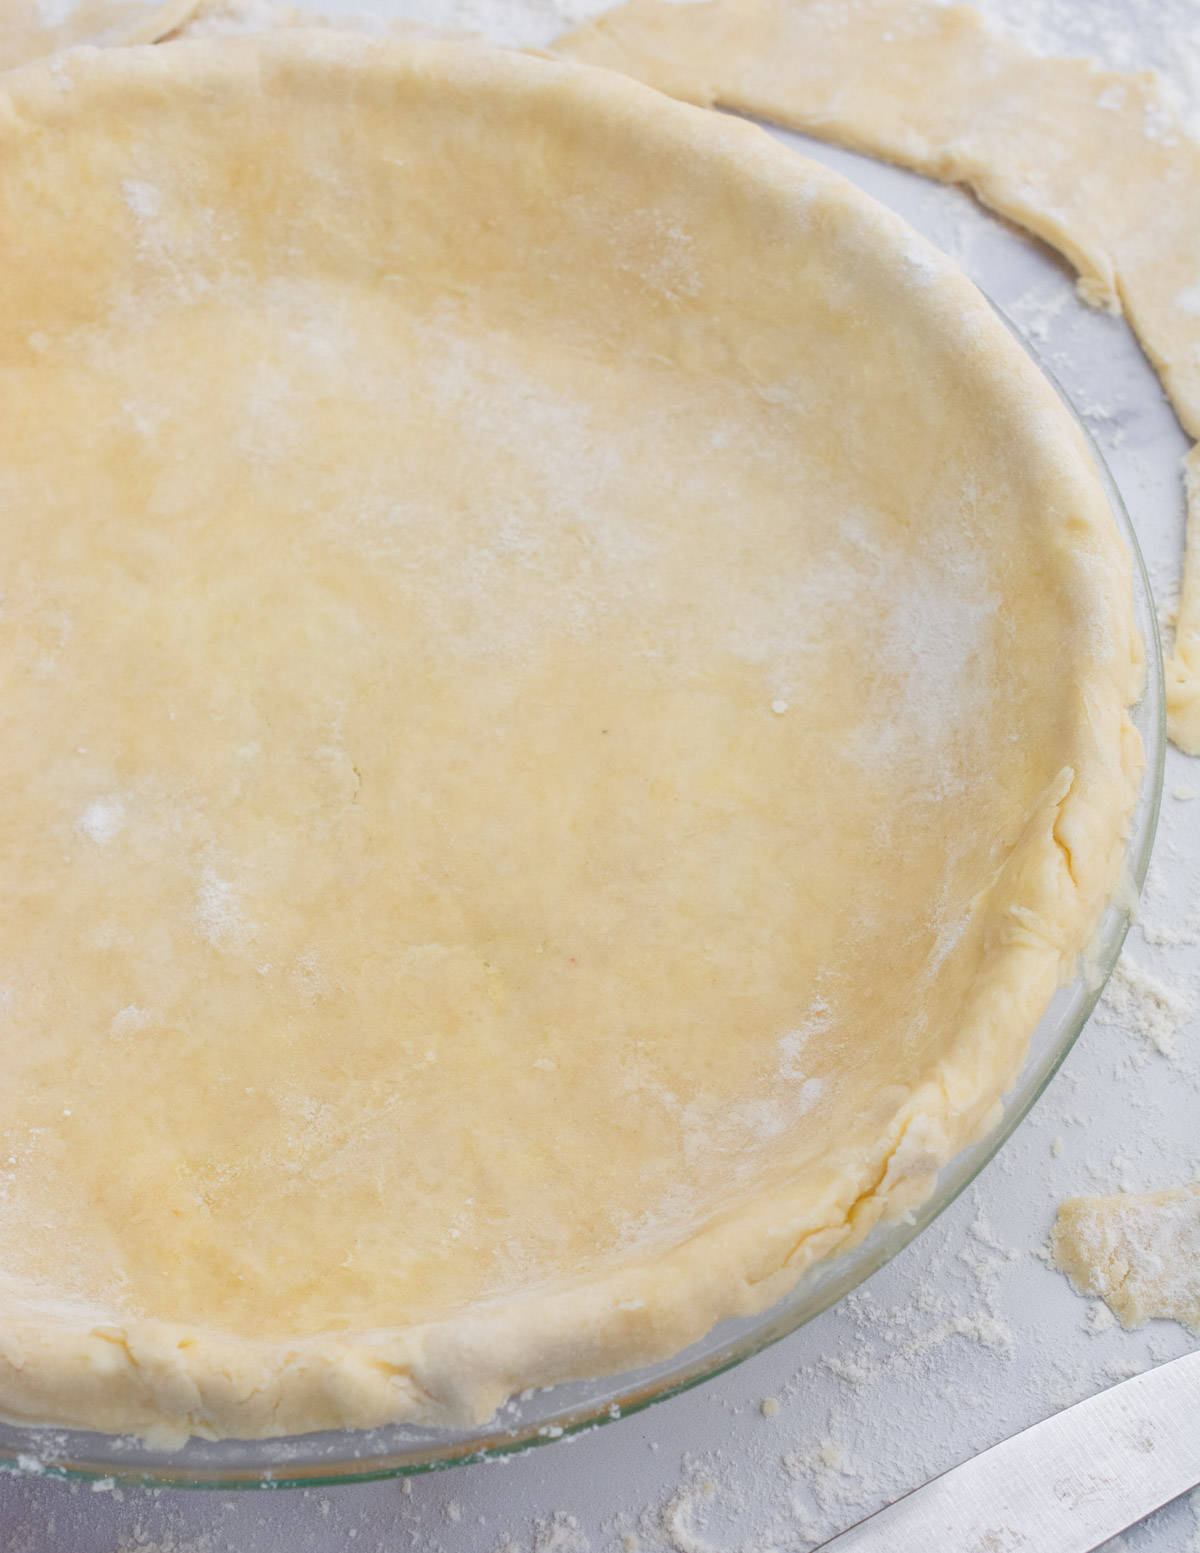
Trim the edges
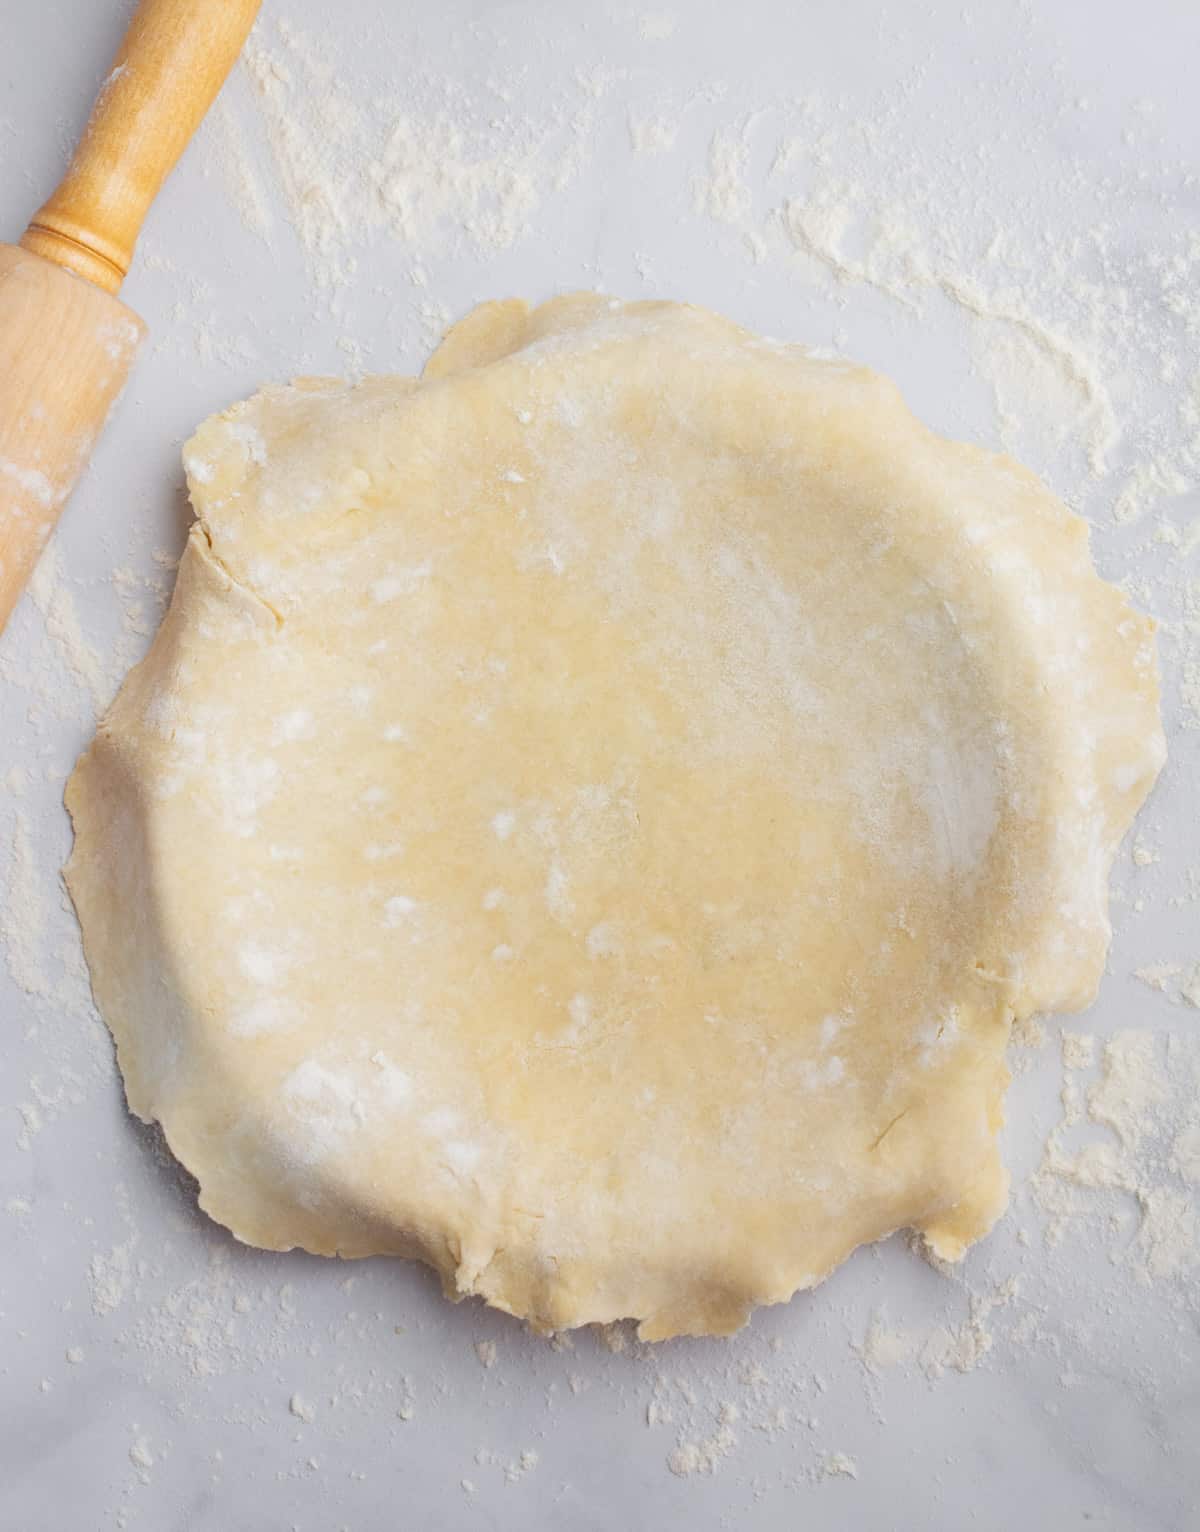
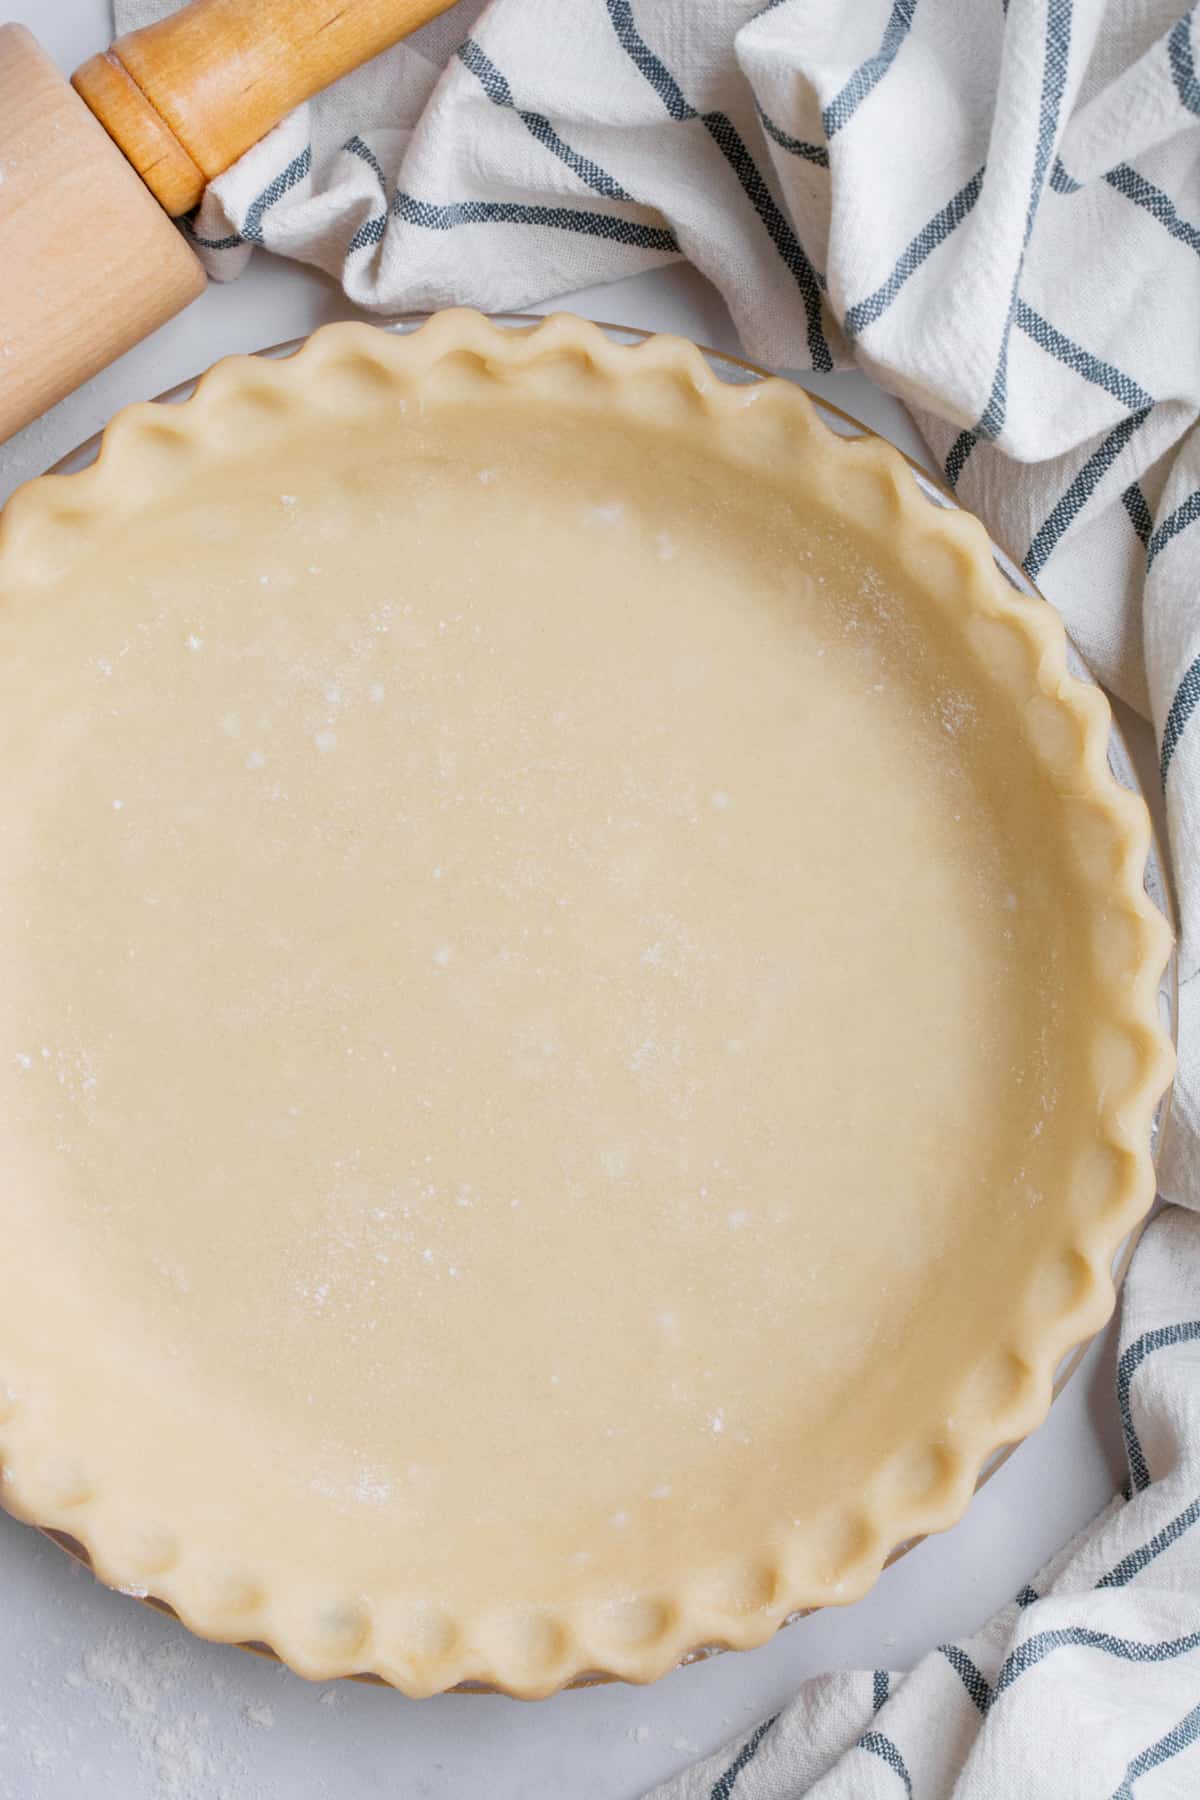
Gently press the dough against the sides so it fits in the pie plate.
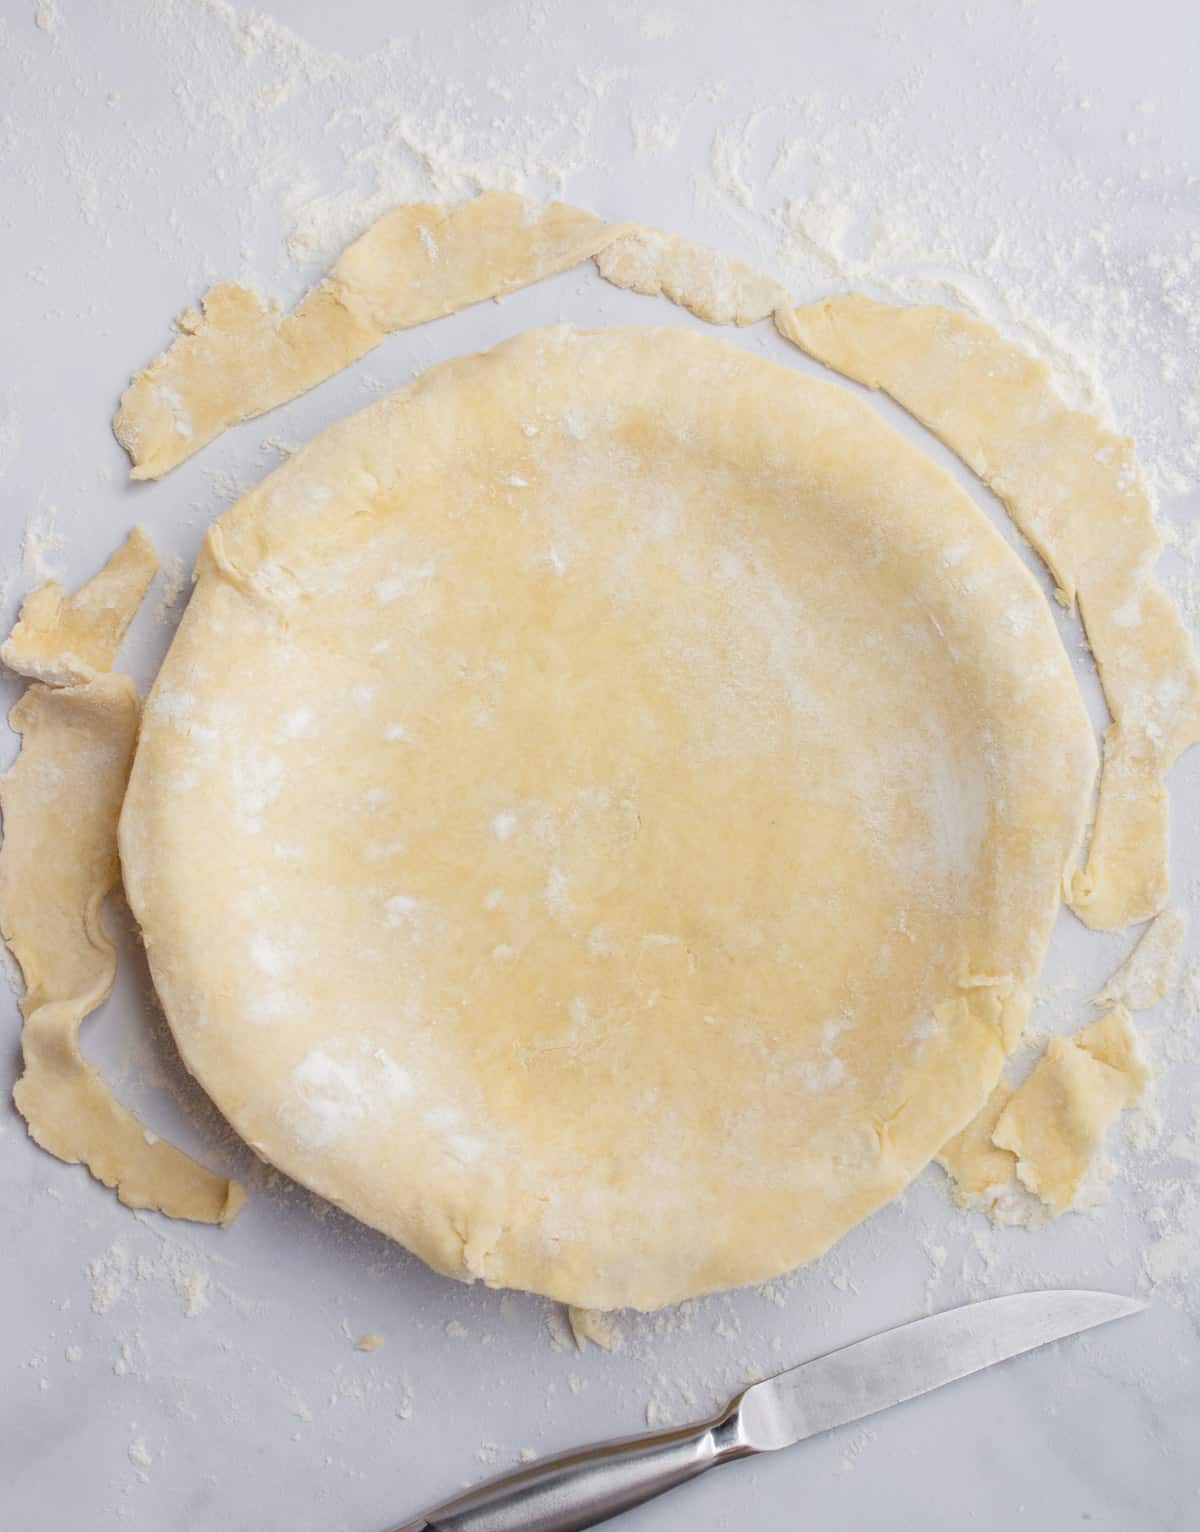
Trim the edges using a knife or kitchen shears. Leave about ¼-inch of dough overhanging the edge of the dish.
Tip: This recipe is fool-proof so cracks and holes are no problem. If your dough cracks press it back together. If it tears or there are holes, use some of the scrap dough that was cut off to fill them in. Once filled and baked no one will ever notice.
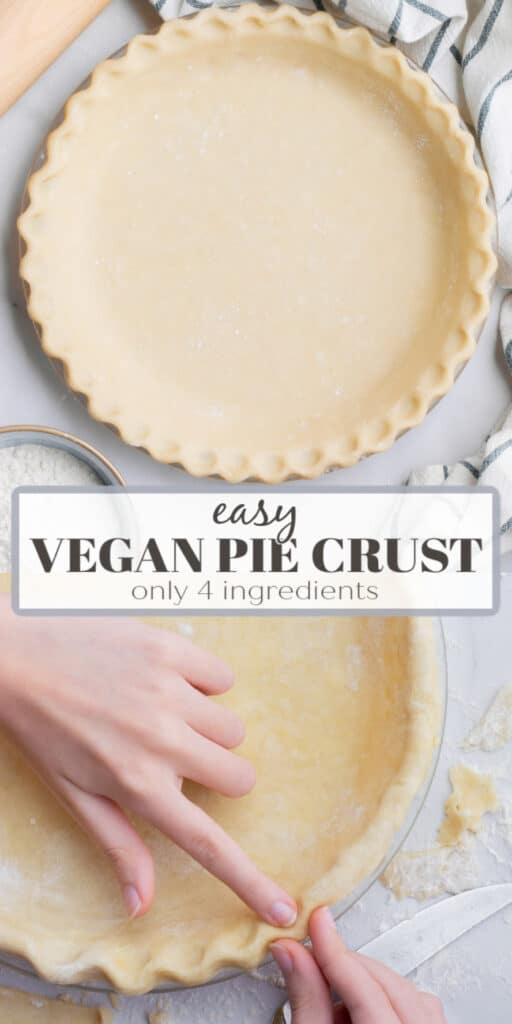
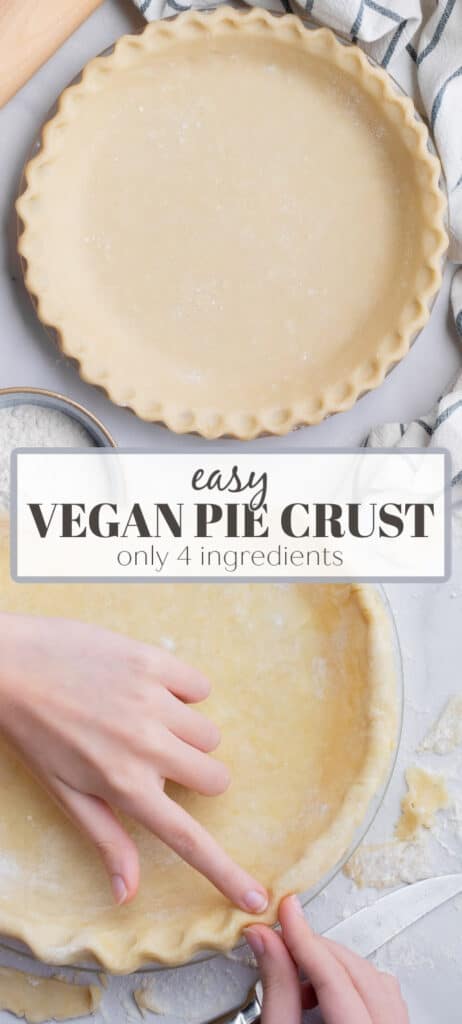
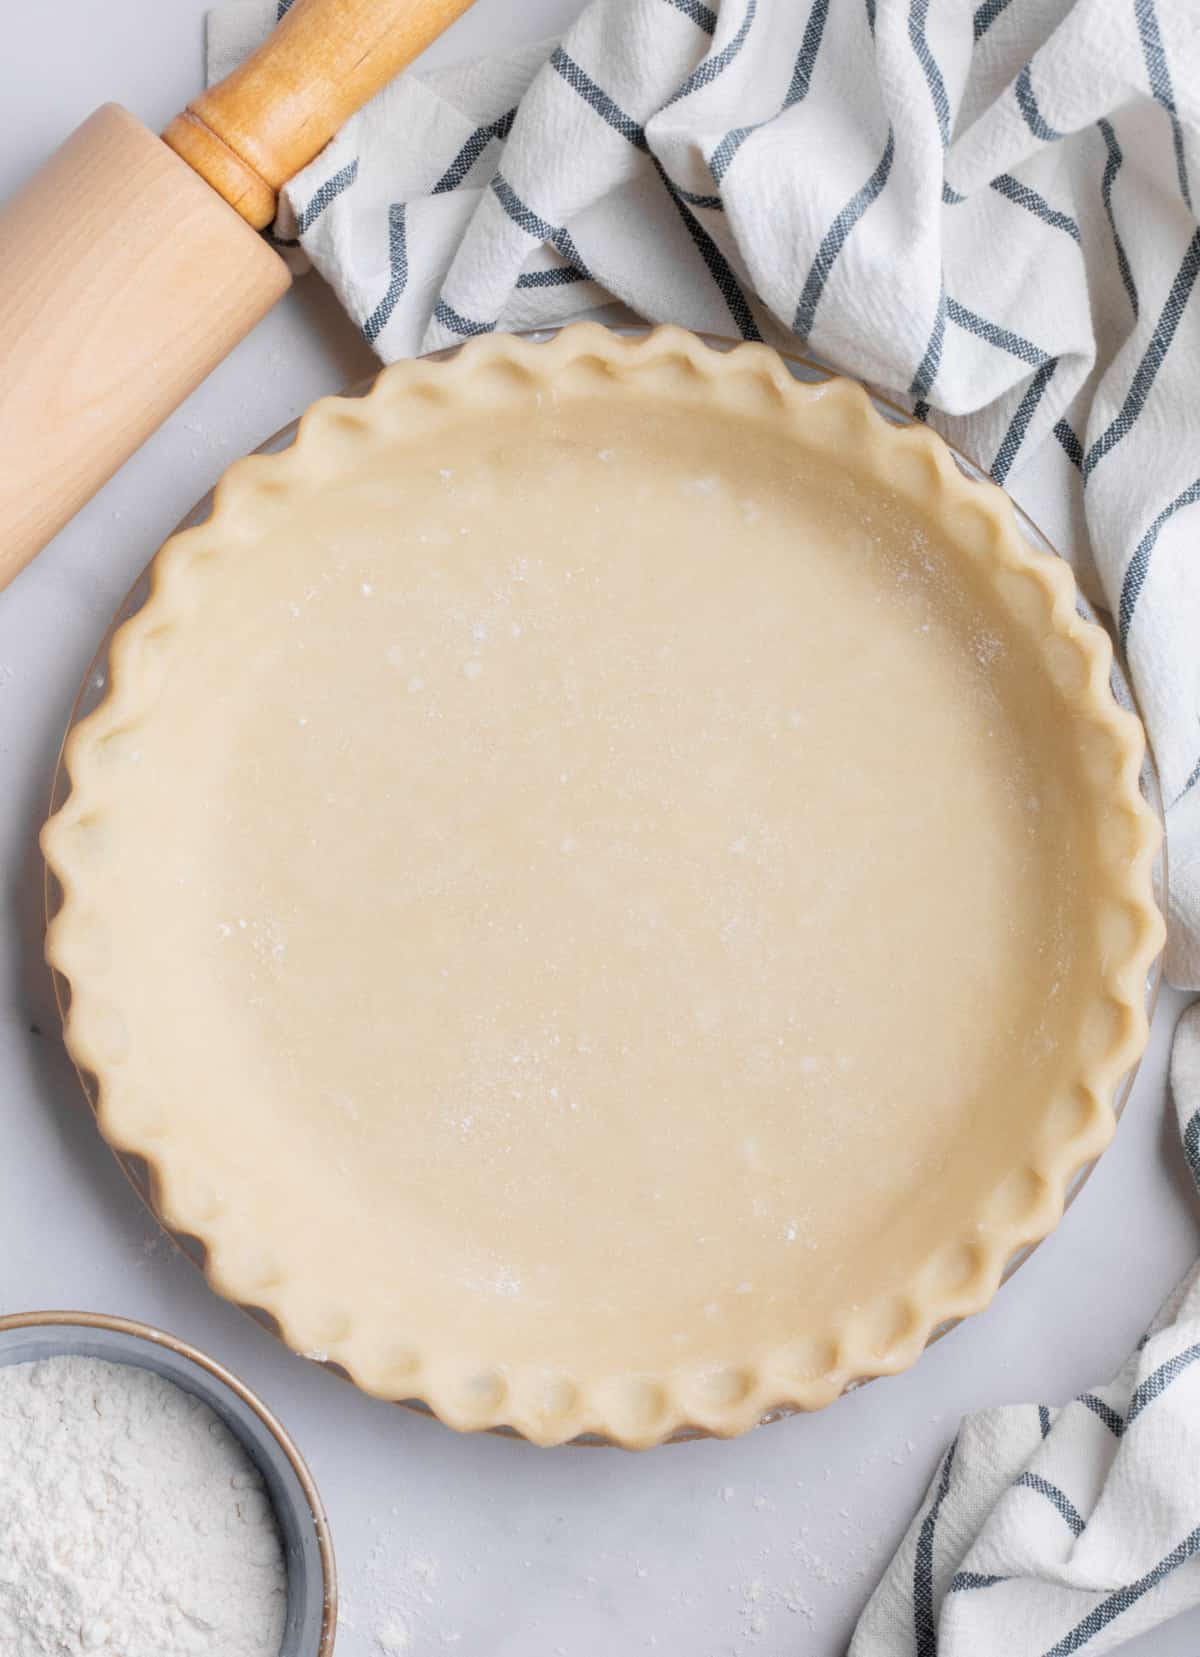
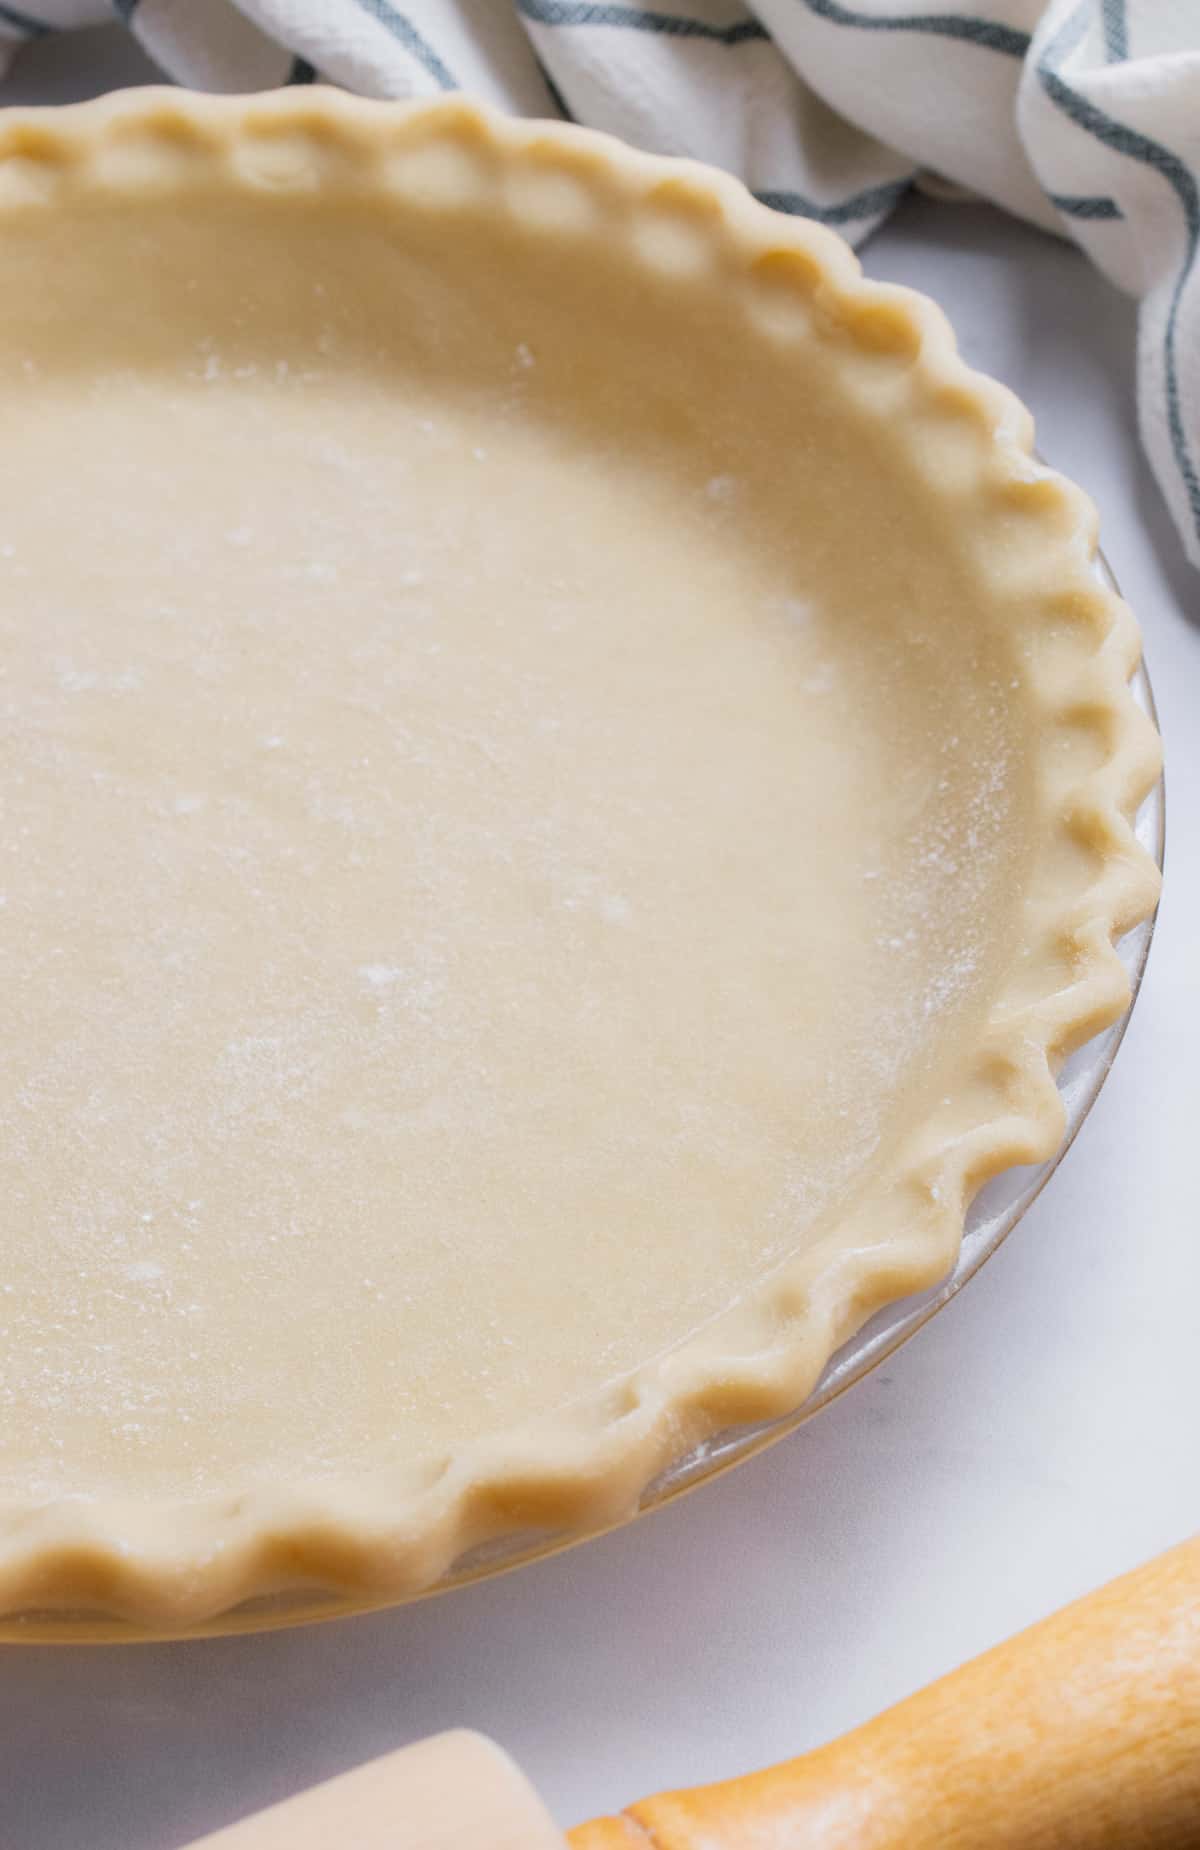
How to Flute/Crimp the Edges
For a single-crust pie, gently fold up the edge to form a peak around the dish as shown above. This step ensures the dough is thick enough to easily crimp the edges.
If you have any thin spots, place a scrap of dough underneath the thin area before folding it up.
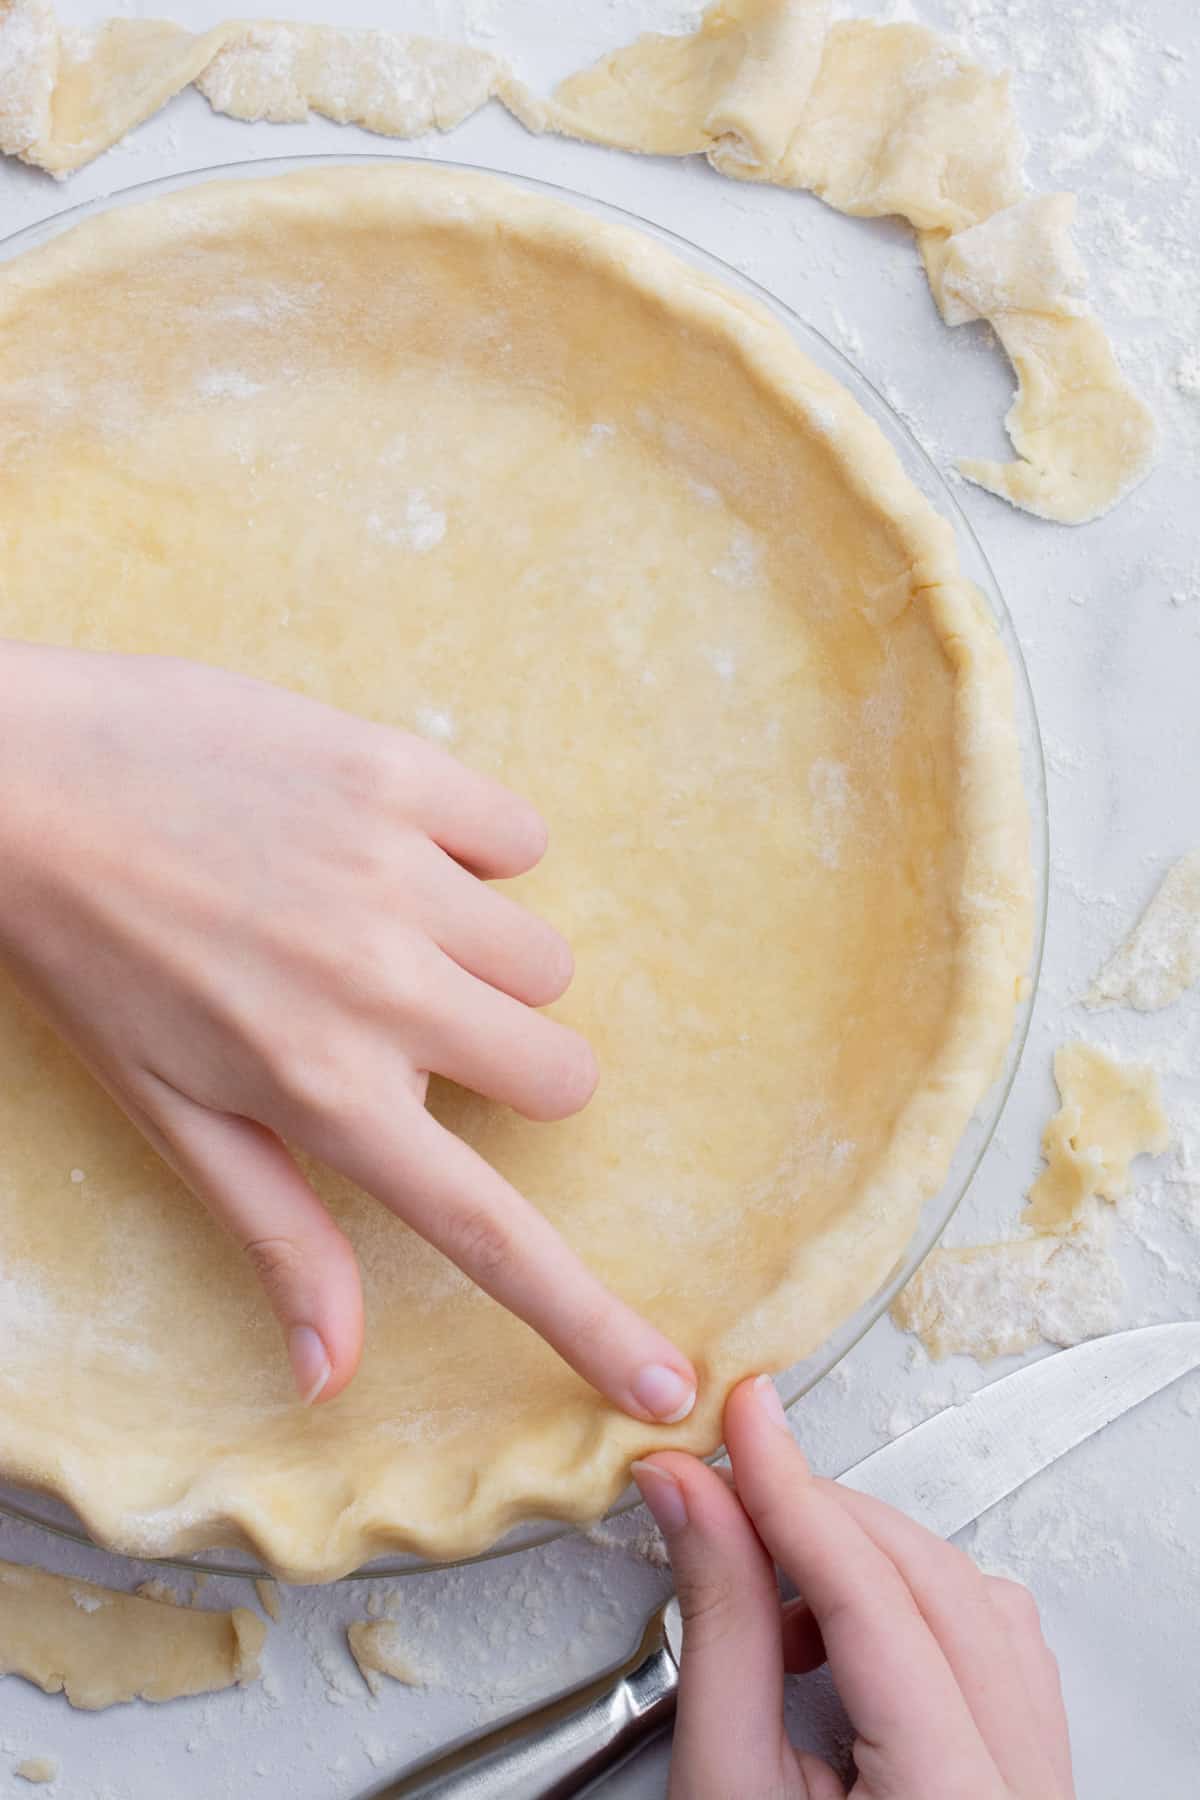
To easily crimp a beautiful edge, bring your thumb and index finger of one hand (I used my right hand) together leaving about half an inch of space in between. Now, press the tips of those fingers against the back edge of the crust.
At the same time, use the index finger on your other hand (or your knuckle) to gently press in on the dough between your other two fingers. See the image above for finger placement. Repeat this step placing your thumb in the previously made indent to crimp the edge of the pie crust.
How to make vegan pie crust by hand
This recipe also easily comes together by hand if you don't have a food processor. Just follow these 4 steps to make the dough.
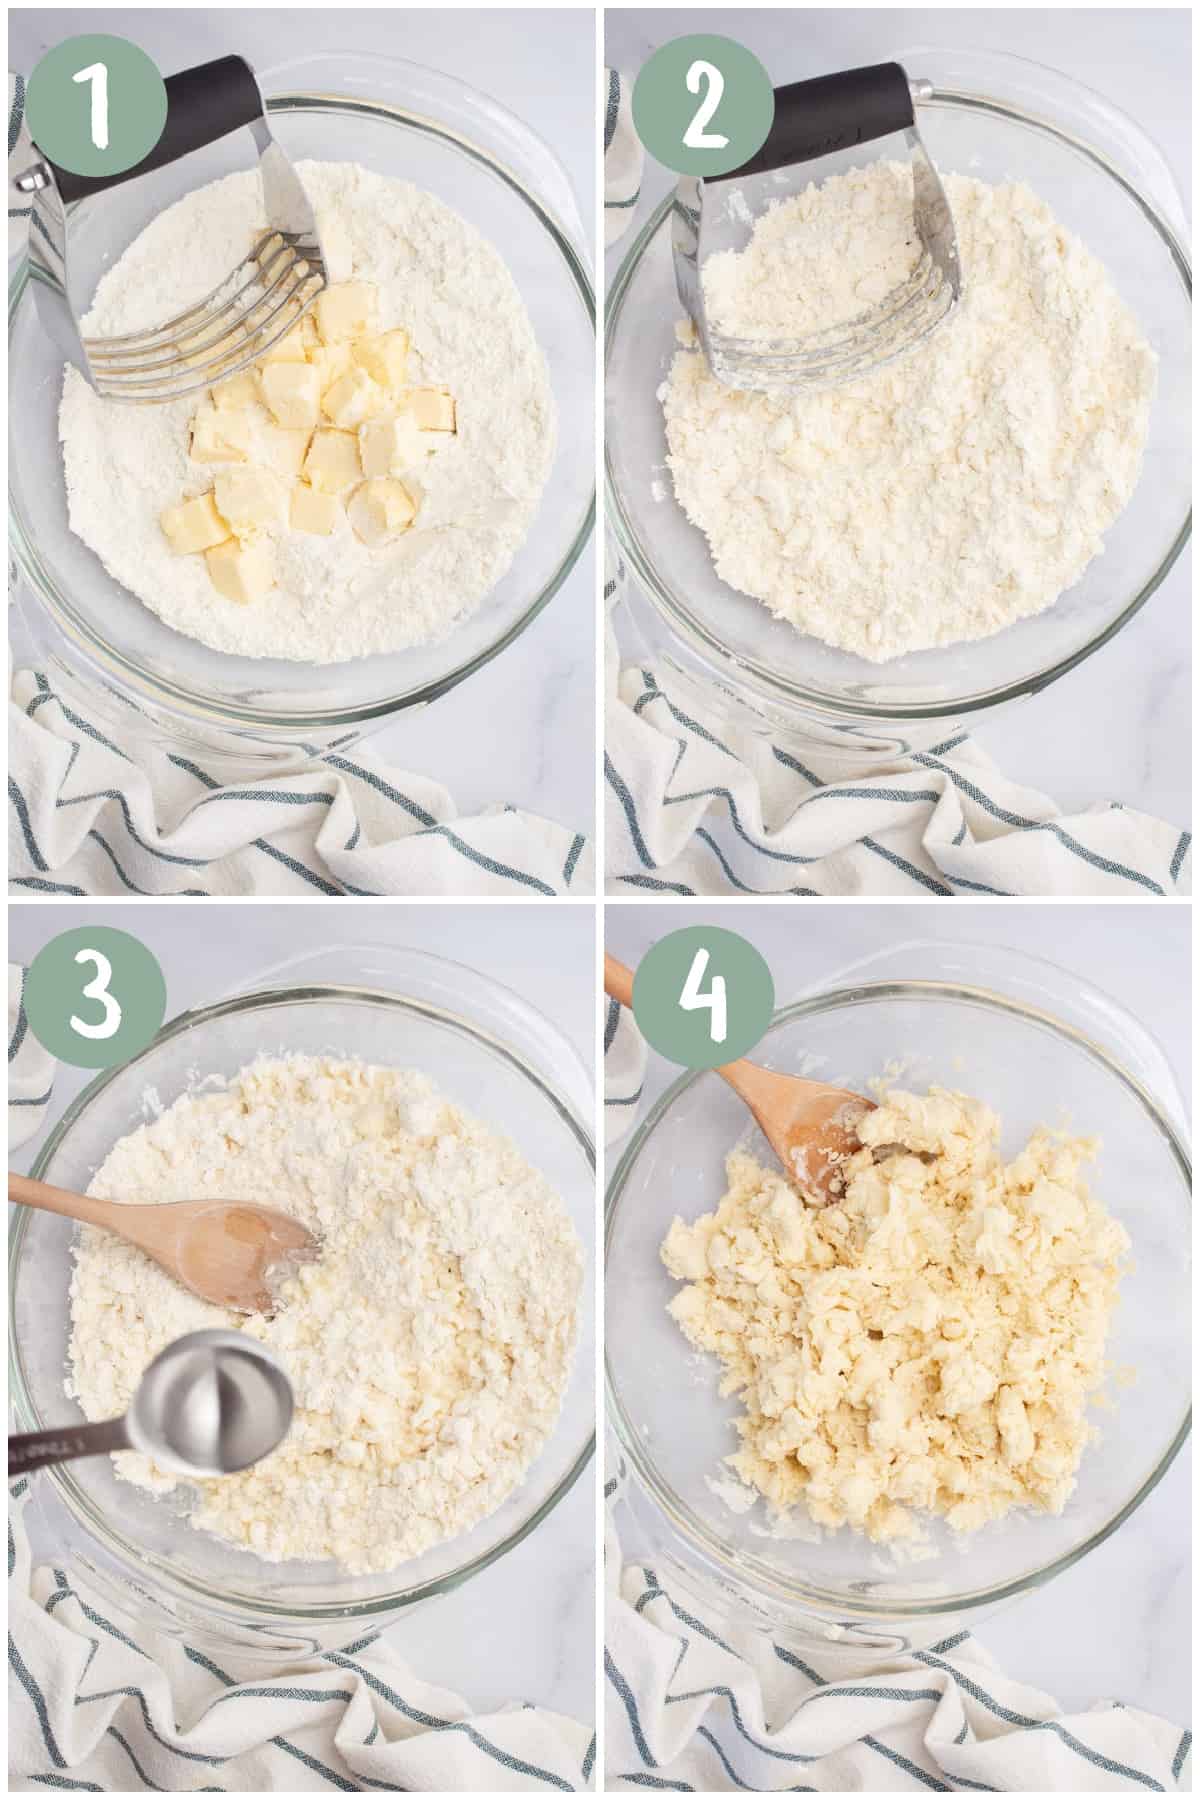
- Add the dry ingredients to a bowl: In a large bowl, mix together the flour and salt then add the cold butter.
- Cut in the butter: Use a pastry cutter or a fork to cut the butter into the flour. It should be crumbly with a few pea-sized butter pieces.
- Pour in the ice water: Pour 2 tablespoons of ice water over the flour mixture while stirring.
- Mix the dough: Slowly add the remaining water one tablespoon at a time, while stirring with a wooden spoon, adding just enough to bring the ingredients together. There should be none or very few dry flour crumbles in the bottom of the bowl. The dough should easily stick together but not be sticky.
Turn the dough out onto a lightly floured surface and proceed with the above steps to work and roll out the dough.
To blind-bake the pie crust
If your pie recipe requires a pre-baked crust, follow these instructions for baking.
- After crimping the edges, use a fork to poke the bottom and sides of the crust to vent it.
- Place a sheet of parchment paper over the crust. Then add a lay of dry rice, dry beans, or pie weights to the parchment paper to weigh it down so it sits on the bottom of the crust. This will keep the bottom from bubbling up.
- Bake at 425ºF for 8-10 minutes.
- Allow it to cool for 10-15 minutes before removing the weights and parchment paper.
Use a pre-baked crust in no-bake pies such as this strawberry pie.
Check out this post on blind-baking and par-baking pie crusts for more information.
Helpful Tips
Cracks or holes in dough: If your dough cracks or has holes in it while rolling it out or forming it in the pie plate, no worries. This is a fool-proof recipe so you can close the cracks by pressing it back together. Or fill in any holes by pulling a piece of scrap dough to cover them.
Cold butter is key: The secret to a perfect pie crust with thin flaky layers is cold butter! Be sure to keep the butter cubes in the refrigerator until you're ready to add them to the bowl of flour.
For a 25-minute pie crust: If you're in a hurry and need to make your crust right away, no problem. Chill the butter cubes in the freezer for 15 minutes before adding them to the flour. After working the dough into a ball you can go right into rolling it out and making your crust.
Rolling out the dough: Be sure to generously flour your work surface so the dough doesn't stick when rolling it out. Every so often spin the dough and dust with flour as needed to further prevent it from sticking.
Frequently Asked Questions
Can I use coconut oil instead of vegan butter?
Yes! The coconut oil should be solid at room temperature. If your oil is soft, measure ½ cup and place it in the refrigerator for 15 minutes to firm it up. Then, follow the same instructions to make the pie crust. Also, you will want to increase the salt to ⅔ teaspoons.
Can I make a double crust?
Sure! Simply double the recipe if you need a bottom and top crust. After working the dough into a ball, split it in half to form two dough balls.
To freeze, tightly wrap the dough in plastic wrap and place it in a freezer-safe bag. Store in the freezer for up to 3 months.
Thaw at room temperature for 30-45 minutes or in the refrigerator overnight.
We'd love to hear from you!
If you enjoyed this vegan recipe, please leave a 5-star rating in the recipe card and share your thoughts in the comments below.
Also, if you snap a photo, share it with us! We love to see your creations!! You can find us on Pinterest, Facebook, and Instagram.
See ya there!
*As an Amazon Associate I earn from qualifying purchases.
Recipe

Easy Vegan Pie Crust
Ingredients
- 1 ½ cups all-purpose flour
- ½ cup vegan butter stick, cubed and chilled
- 1 ½ teaspoons cane sugar
- ½ teaspoon himilayan pink salt
- 3-5 Tablespoons ice water
Instructions
To Make Vegan Pie Crust In The Food Processor
- Cut the butter into small cubes, then place them in the refrigerator to chill until you're ready for them. (See notes for a 25-minute pie crust.)
- Add the flour, sugar, and salt to the bowl of a food processor. Pulse a few times to combine.
- Add the cold butter and pulse to incorporate it into the flour until it becomes crumbly with a few pea-sized chunks.
- While pulsing, slowly pour in 2 tablespoons of ice water. Then, slowly add in a tablespoon of water at a time while pulsing. Add just enough to bring the ingredients together. The dough should be clumpy and easily hold together when pinched. Also, the bowl should have no or very few dry flour crumbles.(I usually use 3 and ½ to 4 tablespoons of ice water.)
Work The Dough
- Turn the dough out onto a lightly floured surface. Use your hands to gently work it into a ball handling it as little as possible. Then gently press the dough ball into a flat disk.
- Wrap the dough in plastic wrap and chill it in the refrigerator for at least 30 minutes to an hour, or up to 3 days. (See notes for a 25-minute crust or to freeze the dough.)
Roll Out The Dough
- When you are ready to roll out the dough, generously flour a large work surface. Place the dough in the center of the flour. Use a rolling pin to roll the dough out to a 12-inch to 14-inch round disc. Tip: I like to hold my pie plate over the crust to make sure there are about 2 inches of extra dough around the edge.
- Using the rolling pin, roll the dough up around it.
- Then place the rolling pin on one side of the dish and unroll the dough across it.
- Gently press the dough into the dish so it fits snugly against the sides.
- Trim the edges leaving about ¼-inch of dough over the edge of the dish.
To Crimp/Flute The Edges
- Gently fold up the edges to form a peak of dough around the dish. This will make it easier to crimp/flute the edge.Tip: If you have any thin spots around the edge, place a scrap of dough underneath the thin area before folding it up.
- To form the edge, bring your thumb and index finger of one hand -I used my right hand- together leaving about ½-inch of space in between. Now, press the tips of those fingers against the back edge of the crust.
- Use the index finger (or knuckle) of your other hand to gently press in on the dough between your other two fingers. Repeat this step by placing your thumb in the previously made indent.See the images in the post above for full visual instructions.
To Make Vegan Pie Crust By Hand
- Mix the flour, sugar, and salt in a large bowl, then add the cold butter.
- Use a pastry cutter or a fork to cut the butter into the flour. It should be crumbly with a few pea-sized butter pieces.
- Pour in 2 tablespoons of water while stirring the flour mixture.
- Slowly add a tablespoon at a time of water while stirring with a wooden spoon. Add just enough water to bring the ingredients together. There should be none or very few dry flour crumbles in the bottom of the bowl. The dough should easily stick together but not be sticky.Proceed with the above steps to form the crust and flute the edges.
To Pre-Bake The Pie Crust
- Preheat your oven to 425ºF.
- After forming the edge, use a fork to poke the bottom and sides of the crust to vent it.
- Place a sheet of parchment paper over the crust. Then add a lay of dry rice, dry beans, or pie weights to the parchment paper to weigh it down. This will keep the bottom of the crust from bubbling up.
- Bake at 425ºF for 8-10 minutes.
- Allow the crust to cool for 10-15 minutes before removing the weights and parchment paper.
Notes
- For a ready-to-go 25-minute crust: If you need your vegan pie crust right away, place the butter cubes in the freezer for 15 minutes to chill. Remove the cold butter just before adding it to the flour. With the super cold butter, you can skip chilling the dough in the refrigerator and go right into forming it.
- To freeze the dough: Tightly wrap the dough ball in plastic wrap and place it in a freezer-safe bag. Store in the freezer for up to 3 months. Allow it to thaw at room temperature for 30 minutes or overnight in the refrigerator.
- Double crust: If you need a bottom and top crust, double the recipe. After working the dough into a ball, split it in half and form two dough balls. You can also choose to make them separately.
Nutrition
**Nutritional info is provided as an estimate based on the ingredients I used and for convenience and as a courtesy only.**
More Vegan Desserts

Where You Get Your Protein is a participant in the Amazon Services LLC Associates Program, an affiliate advertising program designed to provide a means for sites to earn advertising fees by advertising and linking to Amazon.com. This site may contain some of these links to Amazon.com. If you make a purchase through one of those links, Where You Get Your Protein will receive a small commission from the purchase at no additional cost to you.
Comments
No Comments